Today we’ll be talking all about travel partners – why they’re important, how to pick one, and how to keep them! This comes at an important time for me, as myself and my travel buddy book our next trip, and recover from our last one!
What is a Travel buddy?
A travel buddy is somebody that you go on the majority of your trips with. People will define this as different things, but I define it as somebody you go on 50% or more of your trips with. This isn’t to say that you aren’t able to travel with other people, but a travel buddy is someone you feel comfortable enough with to go on the majority of your adventures with.
Why have a travel buddy?
There are numerous reasons why having a travel buddy is advantageous over traveling alone or even just traveling with other, random people. Safety, comfort, and finances are all big factors in determining whether or not to have a travel buddy.
The first aspect to consider in travel buddy perks, is finances. The biggest perk is in hotels. Often the cheapest hotel rooms are two queen beds, and if you are willing to share a room with your travel buddy you can split your hotel costs in half. Seeing as hotel costs are one of the largest costs to consider when traveling, this is a huge perk. Often, you can get discounts on excursions when you buy two or more tickets, and when you purchase private tours, the cost can also be halved.
Comfort is another thing to consider when you are deciding whether or not having a travel buddy is worthwhile. When you are traveling the world, it can be nice to have someone to experience things with. Also, it can get quite lonely to be by yourself in a foreign place with no one to talk to. It can be difficult to explain to family and friends how traveling has impacted you, and it is comforting to have someone who can relate to those experiences. This can be even better when it’s a travel buddy versus a random person, because you will be comfortable with someone you are used to traveling with.
However, the most important thing to consider is safety. Having a partner that is experienced with traveling can be a great benefit when trying to navigate transportation systems, cities, and airports. This helps you not to get lost. Travel problems, such as airplane delays, theft, or scams are almost guaranteed to happen at some point if you travel enough. Having someone to back you up and bounce ideas off of while traveling can be very helpful in keeping you safe. It is also true that people are less likely to take advantage of you if you aren’t alone.
None of this is to say that you cannot travel solo, or with different people. There are some perks to traveling by yourself. If you are looking to travel solo, and you are a female, I highly recommend joining the Facebook page “The solo female travelers”. But I recommend being more experienced, and you definitely have to be more conscious than when you travel with a buddy.
How to select a travel buddy
Deciding who to travel with can be a pretty difficult, and such a big decision shouldn’t be taken lightly. A travel buddy is more than, and different than, a good friend. You don’t need to be best friends with the person you choose to be your travel buddies with, and your best friends won’t necessarily be good travel buddies. There are numerous aspects to look at when deciding who to explore the world with.
Should my significant other be my travel buddy?
As someone with a long term significant other, a lot of people ask me why my travel buddy isn’t my boyfriend. They think its weird that it wouldn’t be the natural assumption for me to want to travel with my boyfriend. However, early on my boyfriend and I discussed our travel desires and interests, and decided that he wouldn’t enjoy traveling to many of the places that I wanted to go. He wasn’t as comfortable as I was with the idea of getting out of our comfort zones and exploring foreign areas. So, although we do travel together, I have a different travel buddy. People assume that this means we just don’t enjoy being around each other, or that for some reason we love each other less than if we did travel together, but that simply isn’t true.
Just because you have a significant other does not mean they need to be your travel partner, and just because they aren’t your travel partner doesn’t mean you don’t love each other. You should base your travel partner on the following criteria, not on whether or not you are dating. If you work well traveling together, then that is perfect. A lot of couples do so successfully and have a wonderful time traveling the world together. However, do not be disappointed if this isn’t what works for your relationship. Hopefully, your significant other is trusting and understanding enough to allow you to travel without them.
Travel Expecations
One of the biggest things to look at when deciding whether or not be travel buddies with someone, is your travel expectations, and whether or not they match with your prospective travel buddy. How often do you want to travel each year? What regions of the world do you want to travel to? What types of activities do you want to do while traveling? What type of traveler do you want to be? Are you more interested in hiking and kayaking for instance, or do you want to visit museums and see beautiful pieces of architecture?
To work well while traveling together, you need to have similar traveling expectations. This should be something you discuss with your travel partner before you ever head out.
Athletic Ability
Something else to think about is your athletic ability. A lot of travel is exercise, and to make sure one isn’t holding the other back, make sure you have similar athletic ability. My travel partner and i hiked 30 miles in one week – if one of us was considerably slower than the other, or didn’t like to exercise that much, this could have led to a serious point of friction, and caused us not to see as much as we wanted to. After several weeks of adventure, its possible that your feet will hurt, your muscles will be sore, and you will be tired. After all of this, small differences in athletic ability will be very noticeable. Although being of different athletic ability shouldn’t entirely stop you from traveling together, its a point of consideration when you are choosing someone to travel the world with.
Financial situation
A tough discussion, but a necessary one nonetheless, is the financial situation of both people. Regardless of where or how you travel, traveling is expensive. If you are going to travel with someone, you have to determine how much each of you are willing to spend each year on travel. Be reasonable with each other, and select a reasonable amount to save up each year. If your financial situations are vastly different, it may be difficult to travel together – one of you will either need to travel less, or finance travel for the other person. This can lead to some resentment.
If your financial situations are not similar enough, this doesn’t mean you guys can’t travel together. But it may mean that the person with a more flexible financial situation travels with different people for part of the time as well, so that neither person is limited.
Time commitments
We all have lives that limit how often we can travel, and when we can travel. If one travel partner can only travel in summer, while the other travels only in fall, it can be difficult to find time to travel together. Another issue can be, if one person can only travel for a week a year, but the other can travel for half the year. This difference in expectations and needs can lead to friction while traveling, which is never good. Unfortunately, if your time allowances have no overlap, it may be difficult to travel together, however if it is just an issue of the amount of time, this does not mean you can’t travel together. As with finances, maybe one person just travels without the other for a portion of time.
Personalities
This is where friendship comes into play. Obviously, if you can’t get along with your travel buddy while you aren’t travelling, then it will be difficult to travel together. Although you dont need to be best friends, you do need to be able to get along well and socialize together. Traveling is often stressful and tiring, so being able to get along while you are tired and irritable is essential while traveling.
You don’t need to have similar personalities necessarily, but you need compatible personalities. And personality needs differ when you travel together. If one person isn’t a good planner, it may be necessary for the other person to pick up the slack. Maybe one person is good at navigating travel and flights, while the other is better at picking the perfect hotel. This is all something to think about when choosing the perfect travel buddy. Think about the flaws in your own travel style and find someone that compliments that well.
Maintaining a good travel buddy relationship
As I’ve said before, traveling is stressful! You don’t want that to lead to misery and hate between you and your travel buddy halfway through the trip, especially if you two are also friends at home. So, having a good plan to deal with this stress before leaving is very important.
“The Talk”
Everyone’s least favorite sentence in the world is “We need to talk.” But, with your travel buddy, it is necessary to say those four little words. It is important to talk about each other’s expectations BEFORE leaving for your trip. Not only your expectations for each other, but the trip overall. You should have this talk each time you leave for a new trip to refresh each person on the goals and expectations while you’re away.
Personal space
Regardless of how much you like someone, eventually you can get sick of them if you’re around them for too long. This can be an issue on longer or more stressful trips, where you are with your travel buddy every hour of every day for weeks on end. It is inevitable that at some point you may just need a break from each other. You need to have a way to tell your travel buddy to “F off” politely without hurting their feelings, letting them know that it’s nothing personal, you just need to get the heck away from them for a bit! So, it’s important to talk about this before leaving, during “The Talk”. My travel partner and I decided that if one of us says to the other “I just need some me time”, we have to give them 30 minutes of time where they can get away from us, with no hard feelings. But that’s just what works for us, you and your travel partner need to decide what works for you!
Fighting Negativity
It’s inevitable that you will get cranky at some point while traveling (At least, it is for me. Maybe some of you are better people haha). So it’s important to have a gentle way to tell your travel partner “Hey, you’re being a b*tch. Calm down.” For my travel buddy and I, we decided on the phrase “Stay positive!” I didn’t think we would need to use it, but after I lost my credit card in the only state in the US that didn’t host my bank, my travel buddy said it to me a few times. Sometimes bad things happen while you’re traveling, and it’s good to be able to be supportive of each other and be able to help each other. This is part of how my travel buddy and I do that, and I hope it works for you as well.
honesty
A big part of “The Talk” is just opening an honest pathway of communication between travel buddies. If you can’t be honest with each other, things will fester and before you know it, you’ll hate each other. Make it clear that you can tell each other anything that’s bothering you, without the other person taking it personally. If you’re doing something that bothers your travel buddy, they should be able to tell you without it hurting your feelings. Because it’s better for them to tell you upfront than for them to hold it in and hate you for it.
expectations
The one thing that is important to discuss prior to every single trip is the goal of each trip. What are you trying to accomplish? What’s the plan? What type of trip do you want to have? Small things like how active you want to be, how steadfast the plan needs to be, how late you want to sleep in each day, and how much you want to spend on food don’t seem like a big deal, but end up being what makes or breaks a trip and a friendship. One big clarification that my travel buddy and I made was that if one of us wanted to “leave the trail” to go see or experience something, we would change the plans to fit it in. Another thing we determine before each trip, is how many times each person is allowed to change or cancel a plan because they feel uncomfortable or want to do something else, regardless of the feelings of the other person. For instance, in Barcelona we each had 3 “get out of jail free” cards, that we could use to cancel any plan during the week for any reason. This is what worked for us, but it may or may not be what works for you. Just make sure to iron out all the details before you get there!
I hope you all found this information helpful! Until next time, live free my fellow travel bugs!
In summer, Barcelona is warm and humid. The 80 degree Fahrenheit temperatures fool you, until you walk outside and immediately start to sweat from the humidity. The region is hilly and covered in smaller, deciduous trees that like the warm, mediterranean climate. The nearby sea can cover the city in a layer of fog in the morning, but this generally burns off by ten or eleven.
What to pack
Clothes:
Something to keep in mind is the humidity in Barcelona. Do not try to wear thicker clothes or jeans – you will be miserable (my travel partner an attest to this, after we had to return to our hotel for her to change when she tried to wear jeans for a day). Breezy tank tops, dresses, and cloth shorts and pants are the way to go in order to be comfortable
Other
Money Belt: Petty theft is pretty rampant in Barcelona. The local law enforcement does little in repercussions for theft, and people know this. I would not recommend trying to bring a purse – wear a money belt instead to avoid getting robbed. Its also so much easier, since its always on you and impossible to lose!
Backpack: We brought a backpack although many say to not to due to theft, and I’m glad we did. We were able to put a water bottle, shawls, and other little things in there and had them throughout the day. My only comment is to pack the backpack as though you expect it to be stolen – don’t put expensive items in there and most definitely do not place your ID’s or money in there. When walking through busy streets carry it on your front, and always have an eye on it.
GoPro and shoulder attachment: Although I looked somewhat silly, I was able to have my go pro on my shoulder throughout the day, where it was unable to be stolen from me and where I was able to get some great footage of our trip! (Look at our video to see the footage!)
Passport and copy: Although we never needed to present our passport throughout our trip, you are required to have it on your person while in Spain, and law enforcement is legally allowed to ask you to present it. So keep it in your money belt, on your person at all times. In case of theft, make sure to print out a copy of the main page of your passport and leave it in your hotel – this will make international flight much easier.
Sunscreen: Both my travel partner and I got burnt on our trip. During summer it is hot and sunny, and you will be exposed to the sun. Remember to use sunscreen, and having a shawl or some sleeved shirts is never a bad idea!
Where to stay
Front of Hostel Fernando. (Not my photo, I forgot to take one!)
We stayed in a private room in the lovely Hostel Fernando. Although it is a hostel, they do offer private rooms with private bathrooms, for prices considerably cheaper than hotels in the area. The rooms were surprisingly large, and the beds surprisingly comfortable. Breakfast is included, and its very good with a lot of options. You also get free wifi and a discount to their restaurant. Its an unassuming hotel front on a somewhat crowded street that certainly wasn’t our favorite street in the city – but the location was perfect for our uses. A three minute walk to the metro and La Rambla, and walking distance to almost every major attraction made this an amazing home base.
Barcelona map
Poble Sec and Montjuic:
When you arrive at the Barcelona International Airport, you will be in this region. As you drive towards the downtown region of the city, you will most likely see Montjuic and possibly even the port. The region around Montjuic is a very high end housing region. Pretty trees, parks, and sidewalks dot the area. There aren’t a huge number of shops or restaurants, but there are some high end hotels to stay at. This area is nice, but kind of out of the way of some of the sights that you will most likely want to see while you’re in Barcelona.
El raval
El Raval is just outside of the Gothic Quarter, and may be the perfect middle ground for those who don’t feel comfortable staying in the Gothic Quarter, but want to be closer to the action than some of the outskirt regions. This area is characterized by cute apartment complexes, some restaurants and shops, and a tree dotted here and there.
Gothic Quarter
This is the region we stayed in, and we were happy we did. Central to almost everything in Barcelona, and within walking distance of the beach, this is the perfect central hub. However, this area is characterized by small, dirty streets filled with tourists and those looking to take advantage of tourists. You do have to be aware of yourself and what you’re doing to make sure you don’t get pickpocketed. Some may feel uncomfortable with this area, but we never felt unsafe, and were never robbed. Just use common sense and this area will be perfect for you!
A Note About La Rambla
When we researching Barcelona, we kept hearing more and more about La Rambla (Or Las Ramblas). Everything I read told me to steer clear of this street, making it sound like if you stepped foot on the road you would automatically be robbed. This is not the case at all. Just remember to be cautious – wear a money belt rather than a purse, and if you have a backpack wear it on your front instead of on your back. Avoid the street at night just to avoid hecklers. I wouldn’t buy anything on this street, or eat on this street since everything is a lower quality and a higher price. But this is a great way to access the metro system and get to some of the cooler areas branching off of the road.
Eixample Right
This area is located near La Sagrada Familia, Casa Batllo, Casa Mila, and is closer to Park Guell than the Gothic Quarter. For that reason, if you don’t mind being farther away from the shopping and the beach, this may be the perfect place to stay. Its a bit more calm and clean than the Gothic Quarter, and has some great food options. If I were to stay somewhere else in Barcelona, this is where I would have stayed. Still use common sense and wear a money belt instead of a purse!
Barceloneta
Barceloneta is the beach region of Barcelona. This is a bustling, busy region where you want to exercise the same cautions that you would in any other touristy region of Barcelona. On your way to the beach you will see multiple blankets laid out with knockoff items for sale by illegal street vendors. There are some pretty unique, interesting restaurants to stop and try on your way around this region, and most of them are very good (although fairly costly). The beach itself was nothing to cry home about, the sand was very rocky, and when we visited it was too cold or rough to get in the water. Its also incredibly busy, and if you want to go, make sure to get there before noon to get a good spot on the beach. Vendors will wander around the beach as well, trying to sell you food or booze.
(We didn’t spend much time in the other regions, so I won’t discuss them)
Getting Around
If you aren’t from this region, I would highly recommend NOT renting a car. The streets are narrow and busy, and drivers are crazy. The best way to get around, we found, was the metro. For one week, we each purchased a 10 ride ticket (which you can buy at the ticket stands there), and used exactly 10 rides for the week. This was a great deal, and cost about $10 for basically all of our transportation for the week. There are two metro stops located on La Rambla, one of which was a three minute walk from our hotel. The metro has busses run every three minutes, and takes you basically anywhere in the city. Even I found it rather self explanatory, and I am not accustomed to riding these types of systems.
The other options is taxis, which is considerably more expensive, but still rather quick and easy to use. If you are staying in a more touristy region like Barceloneta or Gothic Quarter, or near a main tourist attraction, it should be fairly easy to get a taxi. Also, most speak English as well as Spanish, but knowing a bit of Spanish before you go can’t hurt. We used taxis to get to and from the airport, as well as to get home after our club night. I recommend taking a taxi at least to and from the airport, since tourists are prime targets for pickpockets while walking around with their luggage, and its worth the extra money to be dropped off directly at your hotel door.
We also took a train on our day trip to Tarragona. The trains run about every 15 minutes and are also very easy to use, but not really necessary if you are staying in Barcelona for your entire trip.
Culture shocks
Note: Differences in culture are based on my own cultural experiences, and therefore are based on what a US citizen would be shocked by. I apologize for this one sided view, but of course I am unqualified to note differences in culture for other cultures/countries, as I am only a visitor to those countries as well.
The Language
In Spain, they speak Spanish (obviously). However, know that it is a Spain variant of Spanish that has a slightly different accent than Central American Spanish. (Instead of hard C’s, they pronounce a more TH sound). Although nearly everyone you speak with in Barcelona and adjacent areas will know English, it is always good to know the native language. If English is not your native language, it would be a good idea to brush up on it as well, since many tourists here are from all around the world, and the most commonly shared language among all of them is English.
Phrases to Know:
1 to 10
“How Much?”
“Check, Please”
“Please, thank you”
“Hello, Goodbye”
“Yes, No”
“Im Sorry”
“How are you? Im Good”
“My name is, whats your name?”
“I would like”
“to go”
“to eat”
“to buy”
“Where is”
“the bathroon”
“The store”
“The Hotel”
“The beach”
Common foods, locations, and items
The Beaches
Although we were told beforehand, we were still both surprised to see women topless on the beach rather regularly. Just note any beach you go to will have topless women around.
The Schedule
Spaniards start everything late. Breakfast is generally at about 10 AM, lunch is around 2-3 PM (followed by an afternoon nap, while the day is at its hottest), and dinner is around 9 PM. When we first got into Spain, this was quite an adjustment for us.
The Food
Paella and my weird face.
Spanish food is centered around carbs (particularly potatoes and bread) and meat. I don’t think we saw a vegetable on our entire trip, save for a few side salads at some more americanized restaurants. I even ordered a meal called “Steak and vegetables” and it came with one piece of asparagus (my partner and I had a good laugh over that). Their meat is also very rich, and often is salted heavily and cured, so bring some tums or the like if you aren’t used to that kind of food, because it made me sick for the first few days of our trip. Tapas are what you will regularly hear about when you read up on spanish cuisine, and for good reason. Any touristy restaurant you go into will serve a whole array of tapas (Small plates, or basically appetizers). Common ones will be croquettes, diced potatoes with sauce, and some type of tomato covered bread. Avoid tapas on main touristy streets, and go on side streets to find really good ones. Also make sure to try the paella at some point on your trip!
A note about the restaurant service: Do not expect the servers to cater to you. They are often on their phones or doing other duties, and will rarely check up on you. If you need something, know that you will need to get their attention and ask for it.
The Drinks
For an American, the coffee style in Spain was very strange. Instead of fancy, sugary frappuccinos or the like, they provide delicious small coffees in glasses hardly larger than a shot. Definitely try some of the different coffees while you’re here.
Sangria is what many will tell you is the alcoholic drink of choice in Spain. At nearly any touristy bar it will be the first thing on the menu. But for a lot of these places, the sangria sucks and is way overpriced. You also rarely see locals actually drinking sangria. Of course, that doesn’t mean you shouldn’t try it. Just make sure to try it at locations off the beaten path to get the good stuff. Also make sure to try some good Spanish wine on your trip. Im not a wine person but still thoroughly enjoyed it. Also, many of the Spanish beers are very good. Try the Estrella Damm, which is brewed right in Barcelona and can be found at nearly any bar or restaurant. Know also that the drinking age in Spain is 16, and we were never asked for our IDs.
I was surprised to find that water was hardly ever served from the tap. If you ask for water, you will pay several euros for it and it will be brought in a bottle. To save money, definitely bring your own water bottle instead of ordering it at restaurants.
The Passport
Im sure you’ve heard by now that when you’re in Europe, you need your passport on you at all times. Heres the thing: we never needed our passport while in Spain. Ever. No shop owners asked for it, etc. However, it is still important to carry it on you in case you are stopped by the police for whatever reason. Its basically your proof that you are legally in the country if you are stopped by a government official. Keep it in a money belt on your person at all times. Make sure to print out an extra copy of your passport and leave it in your hotel in case it gets stolen, and leave a copy at home in case you need someone to fax a copy to you.
Politics
There has been some political unrest in Barcelona in the recent decades. I won’t go into the history of all of it (But you should if you plan on visiting this region). However, you should know that Catalan, the region of Spain that holds Barcelona, has wanted to become its own independent state for a long time now, and have had multiple uprisings against the government. It shouldn’t influence your trip in the slightest, but be aware so you know what the signs hanging from buildings mean, and as a tourist you should avoid the topic with locals entirely.
Because of this, there are policemen posted everywhere. Unlike in America where basically the only time you see a police officer is in a police cruiser, there are policemen walking through the streets all the time in Barcelona. They shouldn’t bother you, as long as you don’t get in their way or do anything dumb.
The Men
This only really applies to you if you are a woman traveling alone or with other women. The men in Spain tend to be more “aggressive” than in other regions. Not violent or anything like that, but catcalls and the like. My partner and I got catcalled often, especially in the evening, something we aren’t entirely accustomed to since it is frowned upon so harshly where we’re from. My partner even got stopped by a man who was insisting she go to a club with him. Just remember that if you get in a situation like this, be adamant, firm, and aggressive. Then leave the situation as quickly as possible.
Experiences
Day 1
La Sagrada Familia
If you go to Barcelona, you have to go to La Sagrada Familia. The brainchild of Antoni Gaudi, this massive church was not finished in his lifetime (and he knew it wouldn’t be) and is still being built today. It probably won’t be completed before even I die, but I’m sure it will be spectacular when its done. Already, it has to be one of the largest buildings in the city, and is very apparent on the skyline. It currently has four spires, and will have 18 when its done.
The best times to go are right when it opens, or right before it closes. This is when it will have the least amount of people, and the best sunlight (you’ll understand why this is important once you’re there). Give yourself about an hour to view the area. If you can pay the extra to view the upper area, it would definitely be worthwhile – unfortunately it was closed while we were there. On the metro, take line 5 (L5, blue) to Val D’Hebron. You’ll have a short walk there once you arrive. For us, when we walked up the stairs from the metro and turned around, we were immediately awestruck by Sagrada Familia. You shouldn’t have a hard time seeing it.
Note that this is a church, and as such it does have a dress code. Shoulders, cleavage, and stomachs should all be covered. Long Pants should also be worn. We were told you have to also wear closed toed shoes but many people were walking around in sandals. You have to go through a security system much like those at the airport to get in, so give yourself 10-15 minutes to get in. Definitely buy your tickets ahead of time, as they do sell out, and you can get them for much cheaper online.
Casa Batllo
Pronounced “Casa Bye-O”, this is another one of Antoni Gaudi’s works, and is designed after the ocean. Its not a terribly far walk from La Sagrada Familia, which is why we decided to do these on the same day. If you can score the night tour, I have heard this is very good.
This is another expedition that you should buy beforehand. At about $30 USD a ticket, it was the most expensive venture we took while in Barcelona, but it was worth it. When you walk in, you will be fitted with a headset and a small, phone sized tablet that will explain the different rooms, as well as show what it would have looked like while it was being used as a house. Expect to walk quite a lot in Casa Batllo, as you do end up walking up quite a few flights of stairs to see the house in it’s entirety.
If you plan to take the metro to this attraction, take L3 (green) to the Passeig de Gracia stop. Make sure to give yourself a good two hours to get through the entire house.
Day 2
Day trip to Tarragona
I knew I wanted to take a day trip to another town at least once on this trip, and we were choosing between Girona, Sitges, and Tarragona. All three of which are perfectly viable options for day trips out of Barcelona, and all of which you should look into if you are wanting to do a day trip. We chose Tarragona for a number of reasons. A) It was the cheapest train ticket, at about $10 each way. B) It was a reasonably timed train ride, at approximately an hour long. C) It had a wonderful looking beach area. D) It had roman ruins, something I really wanted to see.
Remember to pack towels, sunscreen, and comfortable shoes! To get there, you need to take the train (you could take a taxi but it would be fairly expensive). To get to the train if you aren’t within walking distance, take the metro to Passeig de Gracia (there are other train stations but this is the one we used). Both L2 and L4 take you there, which are the yellow and purple lines. This station is cool because you don’t need to leave the underground system to hop from the metro to the train. Then go to the train ticket electronic and order a ticket to Tarragona, which will be under the name Tarragona in the system. Its a good idea to check departure times before arriving.
Once your there, its a good idea to check how the weather varies throughout the day. We thought it would be warmest around 2 or 3, but it was actually warmest in the morning. Plan your beach time at the warmest point of the day, and don’t be walking around during that time since it gets hotttttt. You’ll easily be able to spot the beach entrance, since it directly adjacent to the train station. We started at the roman ruins, which are actually spread throughout the entire city, so be prepared to walk a lot. Start at the amphitheater and purchase your tickets. We purchased the 3-location ticket, with discounts because we were students. This ticket will probably take you a good 3-4 hours to complete at least, so make sure to time it into your plans. You will see an elevator once you leave the amphitheater that takes you up to where the rest of the ruins are.
After the ruins we went to the cathedral, which I highly recommend. Its kinda out of the way, so bring a map or directions on how to get there. You’ll wander in and out of colorful, narrow empty streets with cute restaurants and stores. I recommend giving yourself an extra hour to explore these spots before getting to the cathedral. The cathedral itself is generally quiet and fairly empty. It has wonderful architecture and a very pretty courtyard. Id give yourself at least an hour to explore the cathedral as well.
Lastly we went to the beach, which was one of my favorite parts of our trip. The sand is soft, unlike that in Barceloneta. The water, at least when we visited, was warm, calm, and crystal clear. My partner and I thoroughly enjoyed swimming and sunbathing (although we both got sunburnt). The beaches are also less crowded than those in Barcelona, and we even felt comfortable leaving our backpack on our towel while we both swam.
Day 3
Park Guell
We took the metro to stop L3 to Vallcarca, then walked. If you are not athletic or don’t have time for a long walk, I would highly recommend against this. You can take a bus or taxi up to the entrance of the park. If you choose to take the bus, get on in Plaza Catalunya and get off at Ctra. de Carmel. If you do take the metro, expect a half an hour of hardcore walking up a 45+ degree angle, broken only by a few escalators.
Once you get inside the park, the rest is pretty self explanatory. Theres a large loop to walk through that is covered with intricate designs from Gaudi. In my opinion, the house walkthrough was not worth waiting in a line for, but the outdoor sitting areas are quite lovely.
If you have time before or after your time in the park, I recommend walking to a lovely restaurant called Las Delicias. Its a bit of a walk, up an unassuming staircase at the back entrance of the park. But it is an amazing, peaceful, walk that gives you a wonderful view of the city. The food at the restaurant is also very good.
Labyrinth Park
Me overlooking the central region of labyrinth park.
To get to Labyrinth park, take line 3 (green) to Mundet, then take about a 10 minute walk up to the park. It’s past a large stadium and kind of out of the way, so make sure to have walking directions for after you get off the metro. Note that his is about a 50 minut trip out of downtown Barcelona, but is worth he trip. It’s 2.50 Eu to enter the park, which is well worth the cost.
We seriously underestimated how large this park is. Having seen only pictures of the actual “labyrinth” we wrongly assumed the park would take less than two hours. Learn from our mistake! This park is HUGE! There are two large buildings to visit (though you can’t go inside), the actual labyrinth, and several separate paths to wander down and explore. I could have easily spent 4 hours in the park.
This park is really a hidden wonder. It was quiet for our entire visit, with only a few, mostly local, visitors. Both my travel partner and myself ranked this park in our top favorite excursions on our trip and I highly recommend making the trek out to it.
La Terrazza
Picture taken offline
We chose to go to a club one night while we were in Barcelona, after being told that the nightlife in the city was lively and not something to miss. We chose the outdoor club La Terrazza to experience something a little different. Take metro L1 or L3 to Espana, and walk to the Poble Espanol. It is an unassuming front entrance, but generally theres a group of people outside that indicates the entrance.
Once you enter, you may question whether or not you’re in the right place. The inside looks like an abandoned town, that winds its way to the actual club. I thought this was fairly cool – walking down cobblestone roads through abandoned shops.
The actual club, however, was fairly disappointing. Drinks were overpriced, to the point that you would need to spend a months salary just to get drunk. The club had a “vibe” similar to that of a high school gym dance. No one was talking, dancing was awkward, and groups didn’t mingle. The majority of people there were very young, ranging from sixteen to twenty, except for a group of older men trying their game on much younger girls. My travel partner and I left only a few hours after arriving, even after trying our best to make the best of the situation. This may not be the norm for clubs in Barcelona, we may have just picked a bad night/club, but we were unimpressed.
Day 4
Castello de Montjuic
When going to the Montjuic Castle, we chose to take the cable car up. To get to the cable car, take L3 to Parallel. You then wait in a line to hop on the cable car that takes you all the way to the top of the mountain, to the castle. This ride is about $12 USD and is well worth the money, as you get a wonderful view of the entire city.
You can also hike up to the castle, although it is difficult to find any information on how to do it. Take the metro to Poble Sec (also getting off at Parallel). Head through the Grec Gardens, up the Laribel Stairs, and head to the gardens of Joan Brossa. Follow Carrer Doctor i Font Quer up to the mountain to the castle. Apparently this is a wonderful hour long hike that leads you past multiple gardens and gives quite a view.
Once at the castle, you’ll head through the main doors to give your tickets (remember to book ahead of time!) and start to explore. Unfortunately, the rooms are all empty or locked. But the grounds are still very pretty, and give you a wonderful view of the city and of the ocean. You are doing yourself a disservice if you don’t wander the grounds before leaving. Explore every inch before heading out, and you’ll find unlikely gems that are not well known by most tourists. My favorite area was a memorial to those who suffered during the Spanish civil war. Make sure to give yourself at least an hour and a half to wander the grounds.
Museu d’arte Catalunya
If you enjoy museums, this museum is a must. To get here, take either L1 or L3 to Pl. Espanya. I highly recommend heading here in the evening, since the museum is fronted by several massive water fountains that apparently light up once it gets dark.
Once inside, you’ll quickly see the museum is divided into four different entrances, two that lead to ancient art collections, while the other two lead to more modern art. Give yourself at least two hours – probably more- to walk the entire museum, and make sure to wear comfortable shoes (it is a LOT of walking!).
Day 5
Picasso Museum
We chose to go to the Picasso museum namely because it was a three minute walk from our hotel, but if it isn’t for you, use L4 (yellow) to Juame 1 to get there. The front of the museum is unassuming, on a narrow street in downtown gothic quarter. Fortunately, theres generally a large crowd outside that indicates its location.
I will say that the employees working there, at least on the day we chose to go, were probably some of the rudest and most unhelpful people we interacted with on our entire visit. They would roll their eyes and snap at us whenever we had questions, which wasn’t helpful seeing as it is a very confusing process to enter the museum without some guidance. For that reason I’ll explain what to do here. First, if you need to use the restroom there is one the opposite direction from the entrance to the museum (to the right in the courtyard). Second, they don’t allow any form of bags or backpacks inside the museum, so there is a locker room adjacent to the entrance that you will need to put all bags in before entering. To do so, you insert 1 Eu to get the key. Once you return the key, you get the euro back. They won’t help you until you do this, but once you have you can enter the museum (which is to the left in the courtyard) and give them your tickets.
The museum itself is wonderful, showcasing art from all of Picasso’s life. They also have detailed segments explaining his works and life in all rooms. However, the museum is very busy and loud, which somewhat took away from the splendor of his works.
St. Joan Festival
We were told that if we got the opportunity to experience a Spanish festival, we needed to. We were lucky to have a smaller festival, the St. Joan festival, during our stay. If you are visiting at a different time, make sure to do some research on the festivals going on in Barcelona before you go, because you shouldn’t miss them. Spaniards throw some of the most elaborate, exciting, beautiful festivals of any culture. Here is a place to start your research https://www.spanish-fiestas.com/festivals/calendar/ .
Anyways, if you do happen to be going to Barcelona at the time of the St. Joan festival, make sure to head down to the beach at around 9 PM with a towel, food, and drinks. Thousands of people will make their way down to the beach at this time to party and play with fire (Yes, actual fire). The festival is intended to celebrate the coming of summer, and the longest day of the year. To celebrate this, locals light off fireworks, have big bonfires, etc. This is why this festival is aptly nicknamed the festival of fire. Although this is less of a festival and more of a massive beach party, it was still very fun and I highly recommend!
Day 6
As our last day in Barcelona, and the day after a festival, we decided to chill out and have a relaxed day, and a cool down day before we boarded our 13 hour flight back home.
Barceloneta
My travel partner insisted we head to the Barcelona beach for at least a day, so we chose to go here our last day. To get there on the metro, take L4 (yellow) to the Barceloneta stop. Fortunately for us, we were close enough to just walk.
If you are going to head to the beach, go early, like 10 AM at the latest. By 1 PM the beach is so crowded its almost uncomfortable, so skip the crowd and go early. I didn’t like this beach nearly as much as the beach in Tarragona – the sand was rocky and the water was too rough to swim in when we went. However, it was still a fun and relaxing morning to spend on the beach. Make sure to keep your items on your person, or within grabbing reach at all times so that people can’t snatch your stuff.
While in Barceloneta, be sure to visit the restaurants nearby. Although they may be a bit pricier than other areas, some of them have very good food. Note the blanket sellers are basically all selling knock off main brand items, which you can barter for lower prices. However, know these blanket sellers are generally illegal, and that the items are completely fake.
Parc De La Ciutadella
After the beach, we weren’t exactly sure what to do. So we looked for nearby things and wandered our way to the city park, hopping from restaurant to restaurant along the way.
I was blown away by this park. Its beautiful and massive. In the middle of a bustling city, people were resting and playing on beautiful grass amongst pretty flowers. If you wander your way through the park, you make your way to a beautiful structure with gorgeous statues and a wonderful pond and fountain. You can also see the Arc De Triomf from here. I highly recommend this park for a relaxing afternoon. Maybe even bring a soccer ball or a frisbee to play on the fields.
I hope you all found this information helpful! Until next time, live free my fellow travel bugs!
Note: This is one part of a two part series, based on a recent road trip through Arizona and Utah. I will reference Arizona throughout this, and discuss the trip as a whole along with focusing on Utah specifically.
Arizona is a desert climate, characterized by blistering heat and sun on most days, particularly in the summer and spring. Here you will see little in the form of precipitation, and whatever little moisture forms is quickly soaked up by the parched ground. The days get very hot, sometimes well over 100 degrees Fahrenheit. Nights are the opposite, and can get very cold very fast. Temperatures, especially in northern Arizona, can and will get to below freezing during the evenings.
The environment is characterized by reddish dirt and sand. You will see cacti littering the ground with little other growth until you hit the northern portion of the state (here you may see some smaller trees, particularly in the grand canyon area). Southern Arizona can be described as flat, whereas the northern region of the state is broken up by far off mountains and beautiful red monoliths.
What to Pack
To look at an in depth list of clothing items to bring, refer to my previous blog called Camping Utah- USA This list may seem extensive, but we actually used nearly everything on this list. One thing I will note is that unless you are planning on coming during the peak of summer, or are only going to be staying in the southern portion of the state, PLAN FOR COLD. This not only goes for your clothing, but what you pack for camping gear as well. People are generally unprepared, since they view Arizona as a warm state with no possibility for cold. This belief is wrong. Make sure to have a 20 degree Fahrenheit or under sleeping bag (especially if visiting the Grand Canyon). Bring plenty of blankets, and use either a pad or an air mattress to get you off of the ground. Bring a canopy in case of snow or rain, and make sure to have a backup plan in case it gets too cold for you to sleep outside. https://docs.google.com/document/d/1LiDnEKhH1-38GfM2vZWk1pAahPR2-_sFMQSUccGdTOg/edit?usp=sharing
REGIONS
Note: During our trip we visited only the Western, Central, and Grand Canyon region. So those will be the regions I discuss here.
Lake Havasu Gardens
Western Arizona is much of what I expected when planning our trip. Small, bristled bushes and cacti speckle the dry and cracked ground. It was sunny all day, and fairly warm throughout the night. We hung out here in Lake Havasu, which is a great place to visit for water sports and fishing.
Central Arizona is much like Western Arizona, with dry and arid weather. Flagstaff is contained in this region, as well as some smaller, more charming towns that are exciting places to visit. Towards the northern region, as you reach the region of the grand canyon, you may even begin to see snow and feel the chill of colder winds.
Grand Canyon at Sunset
Once you reach the Grand Canyon region, you may be shocked by the amount of large trees surrounding you. You may even see snow – we did in April. These conditions surprise most people, so don’t come unprepared. Elk and other larger animals may even be spotted in between the trees. Once you reach the actual canyon, you may be awestruck by its massiveness – but I’ll leave that for later.
Culture Shocks
If you pass through the Navajo region of Arizona, you may get to see first hand some of the differences between native culture and European-American culture. You may even note some of the poverty in these regions, so it is good to be aware when you are passing through Navajo region and maybe understand a bit about their culture as well. Their art and culture has also had lasting influences on the culture of Arizona as well.
Camp Food
Tacos
Ingredients: (Basically whatever you want in tacos) – sour cream – pork (We got a good deal on pork for our trip, and bought over a pound of it. The rest was used later on our trip, in Utah.) – canned corn/beans – onion – sweet peppers – corn tortillas
Cook the pork in some olive oil, and heat up the corn and beans in a pot. Slice the sweet peppers and onions into thin slices and cook in olive oil. Once done, set aside and put your tortillas in the same pan that the pork was in to cook for approx 30 seconds. We cooked a large bunch of this and saved over half for our lunches for the week. We made wraps (using flour tortillas) with pork, sweet peppers, onion, sour cream, and lettuce for lunches and just wrapped them in tin foil for our backpacks. They worked great and tasted delicious!
Steak and Corn
Ingredients: – Ribeye steak – Corn on the cob – romaine lettuce – ranch – cheese
We cooked the ribeye with olive oil, johnny seasoning, garlic salt, steak seasoning, and some meat tenderizer. The corn we wrapped in tin foil with the same seasonings (Minus meat tenderizer). We cooked all of them over the fire. Using leftovers from taco night, we made taco salads as well.
Slice the baby potatoes into quarters, and make sure all veggies are in bite sized pieces. Make a “Bowl” with tinfoil and place veggies, olive oil, and desired seasonings in the “bowl”. Pinch closed to make a veggie packet that is able to be placed on the fire. We used leftovers from the previous night, but if not, cook some steak to go with your veggie packets. Place veggie packets in fire and leave for 20-30 minutes (Until potatoes are soft).
The Road Trip
Day 1-3 are all described in this article. If you are interested in the second half of our trip, take a look at my previous article, “Camping Utah”.
Day 1 – Lake Havasu
Me walking over the London Bridge
Lake Havasu was more of a pit stop for us on our way to the Grand Canyon (which was determined to be too far of a drive for one day for us). Right near the boarder of California and Arizona, this beautiful town is an oasis in the middle of the desert. Spring break here was lively, with free outdoor concerts and college kids in bikinis wandering the streets. But we spent our time adventuring downtown, visiting the London bridge, and enjoying the beach while suntanning. There was a little bit of something for everyone here, with great fishing, boating, and social atmosphere, as well as fun culture and exciting sightseeing.
We stayed in Lake Havasu State park, right next to the water, and it was perfect. The showers weren’t necessarily fancy but they worked, and thats all you can really ask for. They have picnic tables and fire pits as well. This was the only night of our entire trip that temperatures did not get below freezing.
Day 2 & 3: Grand Canyon
Claire overlooking the Grand Canyon on our hike.
One of the first things we noticed as we approached the Grand Canyon, was the snow. It covered the ground and large evergreens, even in April. Be ready for the cold as you get closer. Luckily, we ordered our pass online before hand and were able to avoid what appeared to be an hour long line. Remember to do this before you head out, or you will regret it!
We stayed in the Mather Campground, which was nestled between evergreens. It had a table and a fire pit. It also has full amenities, including showers and washing units, but they are about a five minute drive away from the campground. To get to the actual canyon, you have to hop on one of the numerous shuttle buses to the main visitors center. Buses appear in less than fifteen minutes at any and all bus stops.
As for the canyon, my travel buddy (Claire) actually started tearing up as we approached it. Beautifully colored cliffs and formations spike out of the dip in the ground. We did the Hermit trail hike, and totaled about six miles. I will admit that we did underestimate how difficult the hike would be. It took over an hour a mile, and even longer coming back up, so if you plan to hike into the canyon make sure you have enough time, food, and water. We each had almost a gallon of water, and had drank all of it by the end of our hike.
I hope you all found this information helpful! Until next time, live free my fellow travel bugs!
Note: This is one part of a two part series, based on a recent road trip through Arizona and Utah. I will reference Arizona throughout this, and discuss the trip as a whole along with focusing on Utah specifically.
Utah is a temperate region, with cold winters and warmer summers. Expect to be able to see snow for the majority of the year (at least on the mountains), and prepare for cold evenings regardless of the time of year. During summer temperatures can get into the 80s (F), with summer going from June through August. Winters, and fall and spring, can go below freezing, particularly at night. We went at the end of march, and temperatures were below freezing every night, regardless of how warm and sunny it was during the day.
Many would say that Utah is a flat state, and though true, it really isn’t giving this gorgeous state due credit. Flat plains are broken by enormous monoliths and cliffs, several thousand feet tall and splashed red as though they were painted. The beautiful canyons, rivers, and cliffs littered throughout the grasslands make Utah not only unique, but absolutely beautiful. Plan to be awestruck at every turn.
What to Pack
I am only going to discuss clothing items here, but for a full list of camping supplies that two people used for a week, here is a link. This list may seem extensive, but we actually used nearly everything on this list. One thing I will note is that unless you are planning on coming to Utah during the peak of summer, PLAN FOR COLD. This not only goes for your clothing, but what you pack for camping gear as well. Every night of our trip was below freezing, and one night it actually snowed on us. Place both a tarp over and under your tent to trap in heat, and either use sleeping bags designed for 20 F or less, or double up on sleeping bags. Bring plenty of blankets, and use either a pad or an air mattress to get you off of the ground. Bring a canopy in case of snow or rain, and make sure to have a backup plan in case it gets too cold for you to sleep outside. We had to make an emergency stop to get two sleeping bags and some emergency blankets because we weren’t prepared. Don’t let it happen to you.
Hiking Pants : A good pair of hiking pants for a trip like this are worth the investment. I think I paid about $30 for mine, and I wore them every day. Make sure they fit well and allow for full range of motion. Also make sure they are quick drying, and a lot of pockets never hurt.
Hiking boots: Hiking boots are an investment as well, with a good pair costing several hundred USD. But, they last decades if you take care of them. Dont go on a weeklong hiking trip without a good pair of hiking boots.
Wicking underwear: The last thing you want is to chafe or be uncomfortable. Make sure to pack moisture wicking underwear, this also goes for your sports bra (if you need one!)
Padded Socks: To go with your trusty hiking boots you need comfortable socks. Make sure to bring thick, tall ones that will protect your feet from blisters.
Bandanas: Although it gets cold at night, it can be very warm during the daytime in Utah. Bandanas or headbands can protect your head or neck from sunburns, so it’s nice to bring one.
Athletic tanktops or T-shirts: I wore tanktops every day. It’s warm, so its a good idea to have moisture wicking shirts that will allow you to be comfortable.
Jacket: If you are doing a longer hike, its better to be prepared for anything. Its better not to chance rain or cold, so make sure to pack some type of jacket just in case things go south.
Swimsuit: A lot of the hikes we went on were water hikes, so if you plan on going on any of the hikes I recommend below, prepare to get wet. A towel can be a good idea as well, but if you bring quick drying clothes it shouldn’t be a problem. (after a swim, my pants dried in about 20 minutes!)
Clothes for the Night/Drives
Thermals: It gets cold at night, period. A good pair of thermals to put on under your other layers is essential to keeping warm.
Thick socks: These could be the same as the socks discussed above, but make sure you have thick, long socks that will trap in heat. Possibly put fuzzy socks over the top of regular socks.
Sweatpants: Put a pair or sweatpants or something similar (Something thick) over the top of your thermals.
Long sleeve & Sweatshirt: I wore both a long sleeve and a sweatshirt every night over the top of my thermals. Yes, its that cold.
Ski Mask: Wear one of these in case it gets too cold. To be honest, I wore mine every night. Its a good thing to have.
Gloves: A good pair of thick gloves that you can still perform campground tasks with is essential.
Slippers/Warm Shoes: Bring a pair of comfortable shoes to wear around the campsite. Something warm and easy to put on.
For the drives, just bring comfortable clothes and shoes that are easy to take on and off! I usually ended up in a pair of flip-flops, shorts, and a T-shirt.
Regions
Wire Pass Canyon
Southern Utah is very similar to Arizona in the fact that it is flat and dry, with large rock formations and cliffs jetting out everywhere you look. Here you can find national parks such as Bryce Canyon and Zion National Park. You can also find the famous arches here in the south. Envision red rock and starry skies!
Entrance to Zion National Park
Central Utah is mostly empty space, with charming little towns dotting the sides of the road. Here you are able to see the true character of Utah, in the residents that call these small towns home. Still surrounding you will be gorgeous red rock formations and deserted regions, but ever more trees will begin to appear around you.
Bonneville Salt Flats
Northern region is mountainous and filled with trees, broken up by massive flatlands. Here you will generally see snow on the mountains, if its not snowing on you. This region is more industrious, with Salt Lake City spanning a large portion of the region. Here you can see Salt Lake, and the Bonneville Salt Flats.
Culture shocks
Over 60% of the residents in Utah practice the Mormon faith, so to understand the culture one must really understand this religion, that not only helped to shape Utah’s history, but continues to have a large influence over the state today. Their views are generally conservative and modest, so keep this in mind when you interact with people. As you drive through the state, numerous elegant churches will dot the countryside. If you know very little about the religion, it may be a good idea to study up a bit before visiting.
Camp Food
For the majority of our trip, my travel partner and I ate like royalty. If you plan well, it is easy to eat well for the entirety of your camping trip.
Day 4: Pork Shish Kabobs
At this point in our trip we had already cooked about 2 lbs of pork, with the intent of using it for two dinners and our lunches. This was the second dinner we did. We also had a basic side salad with it, made with romaine, cheese, and ranch Ingredients: – pork hunks – baby potatoes – Sweet peppers – carrots (yes, it actually tasted pretty good) – broccoli – olive oil (Cook pork and veggies separate!) Skewer veggies and pork into desired arrangements. Sprinkle with garlic salt, johnny seasoning, and tajin (or whatever you want, live your life). Drizzle olive oil over the top. Cook on grill or over the fire. If cooking over the fire, be prepared to drizzle olive oil multiple times. Cook until soft and enjoy!
Day 5: Burger and Corn on the cob
Ingredients: – burger patties (or ground beef) – Burger buns – egg – sliced cheese – desired condiments (we just did ketchup) – corn in husk – butter – olive oil Shape burger patties and season with desired seasonings (we used steak seasoning, meat tenderizer, garlic salt, johnny seasoning, and tajin.) Put on grill or over fire. Butter buns and set aside. Place corn with husk on a piece of tinfoil, and drizzle in olive oil (or butter). Wrap in tinfoil and set on grill or over fire, remember to rotate it. Crack egg and cook it over easy. About 2-3 minutes before the patties are done, place cheese on top of them and put buns on the grill to toast. Once done, unwrap and remove the husk of the corn, and butter and season. Put desired condiments on burger and enjoy!
Day 6: Chili Dogs
This meal is perfect if you don’t have access to a bunch of amenities or aren’t camping in a campground. Its easy and doesn’t require a bunch of utensils. Ingredients: – canned chili (You could also make your own chili if you’re into that, we chose for the easy this time) – pork sausages (or beef, you do you) – cheese – egg Cook chili and pork sausages (season how you desire). Fry an egg. In a bowl, place sausage and pour chili over the top. Put egg on top and sprinkle with cheese.
The road trip
We arrived in Utah on day 4 – the first half of the trip was spent in Arizona. I will discuss what we did in Utah in this article, and will talk about the first half of our trip in my next blog!
Day 4: Wire Pass/Paria Canyon
Beginning of the Buckskin Gulch hike.
Once you cross the border from Arizona into Utah, you will almost immediately fall into the lap of Wire Pass Canyon (House Rock Valley Rd, Kanab, UT 84741). This region is characterized by gorgeous layered rocks, and crags covering the ground. This is where you can see the famous wave.
We stayed in the white house campground, which is one of the two campgrounds located near the Buckskin Gulch trailhead (the trailhead that leads to the wave). We chose this campsite because we were told that our car, a little Nissan Cube, would be unable to make the drive to the other campsite. Fair warning now, both the campsite and the trailhead require driving over some pretty rough terrain that my car barely made it over. If it had been wet at all, we wouldn’t have made it to either location. Anyways, once you turn at the rangers station and drive down this several mile long dirt road, you reach white house campground. It is a small campground with a vault toilet, fire pits, and picnic tables. There were about 6-7 sites in total, and only two other campsites were filled during our visit.
Though the buckskin gulch trailhead is only about 10 miles away from the campground, it took us about an hour to get there. Looking back, I probably wouldn’t do the drive again with the type of car that I have. This road REQUIRES a 4 wheel drive or all wheel drive car. Something high off the ground with good tires. The other thing to consider is that the hike from the trailhead to the wave is 14 miles. It is not a hike you can do in one day, and will require a backpacking trip to get to the wave. Keep this in mind! Otherwise, the trail is absolutely beautiful and follows the length of the paria river. You’ll see a variety of gorgeous red rock formations and possibly encounter some cows.
Day 5: Zion National park
The peaks near the entrance of Zion National Park.
As you enter the park, the road will turn from black to red, and the surrounding region will turn from your everyday forest and farmland to massive rock formations jutting thousands of feet out of the ground. You will drive through the base of multiple of these cliffs, and I promise you, that you will be awestruck for the entire drive down into the park. We stayed in the watchman campground, and even though it didn’t have showers, it was a very modern campground with multiple amenities. The campground is well maintained, has a nice bathroom, picnic tables, and fire pits.
To go to any of the hikes you will need to drive/walk from the campground to the visitors center, which is just before the watchman campground. Here you can take a bus to the various trailheads throughout the park. The longest you will ever wait for a bus is 15 minutes, but be aware of when the buses stop running so you don’t have a long and miserable hike back to your campsite.
Due to time constraints, we did two smaller hikes instead of the longer Angels Rest that we wanted to do initially. We were also limited by weather, which had closed some of the other hikes we had been interested in, but regardless, we weren’t disappointed. Our first hike was the lower emerald pools hike. This is basically paved uphill walk thats about a mile long, but the end scene is well worth it. You walk behind a waterfall that is showering down over one of the numerous red cliffs, and are overlooking the gorgeous emerald pools.
The second hike we did is the riverside walk, which leads to the entrance of the Zion Narrows trail (unfortunately closed due to rain when we visited). This was a pretty hike, about two miles roundtrip or so, that winds along next to the river. It keeps you close to the base of some of the massive cliffs in Zion, and allows you to see some of the hanging gardens that are caused by trickling water down their fronts. The end of the hike leads you to the river at the entrance of the zion narrows, and leaves you at a rocky “beachfront” area.
Secret tip: Towards the beginning of the hike, you can see a massive waterfall on the other side of the river. During the summer months when there is less rain, this waterfall may be more accessible, but when we went, the river was swollen and rapidly racing by. Regardless, I made the trek across and it was WELL worth it. If you manage to make it across and make the hike up to the waterfall, you will have a private experience in which you can stand at the base of the waterfall and feel the water splashing down upon you. If you are physically capable of making the journey, I highly recommend it. Crossing at the widest point of the river seems counterintuitive, but actually was the easiest place to cross.
Day 6: Diamond Fork Hot Springs
Early section of the Diamond Fork hike.
Up in the depths of the mountains in northern Utah, you can find Diamond Fork Creek. Most likely, snow will litter the ground around you, with evergreens withstanding the cold. if you are lucky, you may see a stray moose dipping into the icy river for a drink. You may even hear the wild call of a flock of turkeys. As you drive along, you will see a few remote campgrounds to stay in. These are good options as they have paved pads for a tent, fire pits, and picnic tables. They also have one set of vault toilets towards the entrance of the campground.
From the campground, you can drive up to the Diamond Fork Trailhead. Often, a part of the road may be closed and add a few miles to your total hike. When we went, two miles of the road were closed, practically doubling our total hike time. Theres a nice little parking lot that you can leave your car at, and start your hike. You’ll know you’re at the trailhead when you reach a snow-covered parking lot that hosts a public bathroom and a map of the hike. If you are heading out any time close to winter, you will need crampons to complete this hike. Even in the beginning of April, huge portions of this hike were covered in snow. Mix this with the steep slopes of portions of this hike, risk of slipping can be very dangerous.
The hike is very pretty, with evergreens surrounding you and the beautiful river flowing adjacent to you. As you get farther in the hike, the smell of sulfur will grow stronger and stronger. Eventually you will find yourself at the base of a waterfall that leads to a number of different pools, all steaming hot. The closer you go to the waterfall, the warmer the pools will be. A great way to experience these pools is to start at the lowest one and work your way up.
Note: Make sure to drink plenty of water on this hike. If you do end up having to hike the extra two miles of road, this hike is approximately eight miles round trip – not some walk in the park. The heat of the pools leads to risk of heat exhaustion, especially if it’s a sunny day. Be prepared! Also, be wary of snow, it snowed two inches on us overnight here!
Day 7: Bonneville Salt Flats
Waterlogged Bonneville Salt Flats.
We didn’t actually stay in the area of the salt flats, but rather just checked it out on our way back home. It is easy to see the entrance to the flats from the road. There are a few bathrooms and large posters explaining the history and importance of the salt flats. As you walk up to the salt flats, you will see large fields of white. When we arrived, it had recently rained, turning the flats into what looked like a mirror.
You can taste the salt in the air, and if you glance at your car you’ll see flecks of salt covering it. We managed to scoop up a few cups of salt to take home for gifts, and I was glad we made the stop. Not a place interesting enough to stay overnight, but a good stop on your trip! If you do manage to go during summer, you may be fortunate enough to catch Speed week. This is a week where speedsters from all over come to race down the flat’s salty surface. A competition that originates from the early 1900’s, this could be a fun experience to say the least!
I hope you all found this information helpful! Until next time, live free my fellow travel bugs!
Climate: Semiarid. Depending on region can be snowy during winter.
Country: USA
P safety rating: 9
Geography and Climate
Colorado is a temperate region, with warm summers and cold winters. Like the rest of the United States, their winters range from November to February, while their summers are from May to August. Winters can be quite frosty, so generally expect snow and ice. However summers are generally quite pleasant with highs in the high eighties.
Colorado is one of the more mountainous states in the US, due to the Rocky Mountains passing through it. It is also the only state that is entirely above 1000 ft in elevation. Expect to see mountains and a lot of evergreens.
What to Pack
What you should pack varies greatly on what time of the year you are going. If you are heading to Colorado in the winter, pack snow boots and a LOT of warm clothes. Don’t forget a waterproof jacket! The winter can be a great time to hit the slopes, so if you plan to do that pack accordingly.
I visited Colorado during the summer however, so my suitcase looked a little different. I brought a lot of light jackets, jeans, T-shirts, and tennis shoes. This was perfect for this weather. I even wore shorts most days.
The main point is to remember to pack for outdoorsy adventures. Is it really a trip to Colorado if you don’t make a couple of trips out into their beautiful wilderness? So pack hiking boots and walking clothes. Don’t forget to bring an empty water bottle for this trip!
Where to Stay
I actually went to Colorado to visit a friend of mine who goes to school there, so I was lucky enough to already have housing arranged for me when I arrived. Because of this, I don’t have any specific hotel recommendations. My friend lived near Fort Collins, and this was a great central point for all of our adventures. It was a cute, quaint little town that was very fun.
Central Colorado
Central Colorado is likely going to be the region you first visit when you travel here, through the Denver International Airport. This is where you will find large towns such as Boulder and Fort Collins, but also the Rocky Mountain National Park. Everything you may want to do in Colorado is packed into a mighty punch with Central Colorado. You can see nightlife in cities like Denver, but also go white water rafting or skiing. If you are on a limited timeframe, this region is a great place to stay.
I will say though that it may not be a great idea to stay in Denver. As a large city, it does have its fair share of problems and isn’t necessarily the safest place to stay. I would recommend staying in surrounding areas like Boulder, or even some of the smaller towns immediately outside of Denver.
Northwestern Colorado
Northwestern Colorado is less urbanized than Central Colorado, but with that said it does offer an even deeper look into the beautiful wilderness that is Colorado. With geothermic pools and skiing galore, this is a wonderful place to visit for winter. It also has several fossil and petroglyph sites for the archaeologists amongst us.
This is also where you will find the beautiful city of Aspen, which is known for its amazing ski slopes. If you are looking to play in the snow, look no further!
Eastern Colorado
Eastern Colorado is known as the plains of Colorado, and is the least densely populated region of the state. Out here you will see less of the mountains and trees, and more grasslands. Pueblo is the only sizable city in the area.
There are some regions of historical significance in Eastern Colorado, such as the Santa Fe National Historical Trail and the Pony Express National Historical Trail. However, if you are looking to experience “Colorado” I would travel elsewhere.
Western Colorado
Grand Junction is one of the larger cities in Western Colorado, and therefore would be the prime area to stay in this region. This region is significant for its farming and wineries, but there are also numerous outdoor activities to do. Black Canyon is a famous place to visit, and Aspen also borders this region.
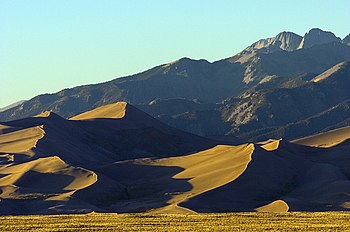
Southern Colorado
Southern Colorado is entirely unique from the rest of the state, due to its dry climate and desert-like geography. The head of the Rio Grande can be found here, in the San Luis Valley. A lot of smaller hotel options can be found around this region. This could be a good home base for those looking for a slightly more unique experience while in colorado.
Getting around
Colorado is a big state, with a lot of empty space in between the cities. If you are planning on exploring at all, I would recommend renting a car for your stay. If you plan to go during winter, or are going to a snowy region of Colorado, make sure you rent a car that has four wheel drive. Also make sure you or someone in your party is comfortable with driving in the snow. Uber and Lyft are both options in the bigger cities of Colorado, and if you don’t plan on leaving the city they can be good options as well.
Culture Shocks
As someone who lives in the US, there weren’t a lot of culture shocks for me while traveling here. Looking back, I can’t think of anything that would be atypical for an American state in the way of culture. If you aren’t from the US, be on the lookout for an article coming where I will discuss US culture and what to expect from different regions and different communities in the United States.
Food
For my trip, I stayed mostly in Central Colorado, so all of my recommendations will be based on that region.
Ewe’s (Manitou Springs)
Photo taken from Yahoo, my phone had died by this point in our trip so I don’t have many photos.
We spent the afternoon in Manitou Springs on our way to the Manitou Cliff Dwellings (which I’ll talk about later). They serve very good, hearty German food and beer. They are known for their beers. Their food was quality for a low price, ~$10 USD a plate.
Kokomo Sno (Manitou Springs)
Kokomo Sno had some of the best shaved ice I have ever had. It was a fun stop before we got back in the car, and was fairly affordable for the amount of shaved ice you get! They are located in Manitou Springs in a food truck.
Krazy Karls (Fort Collins)
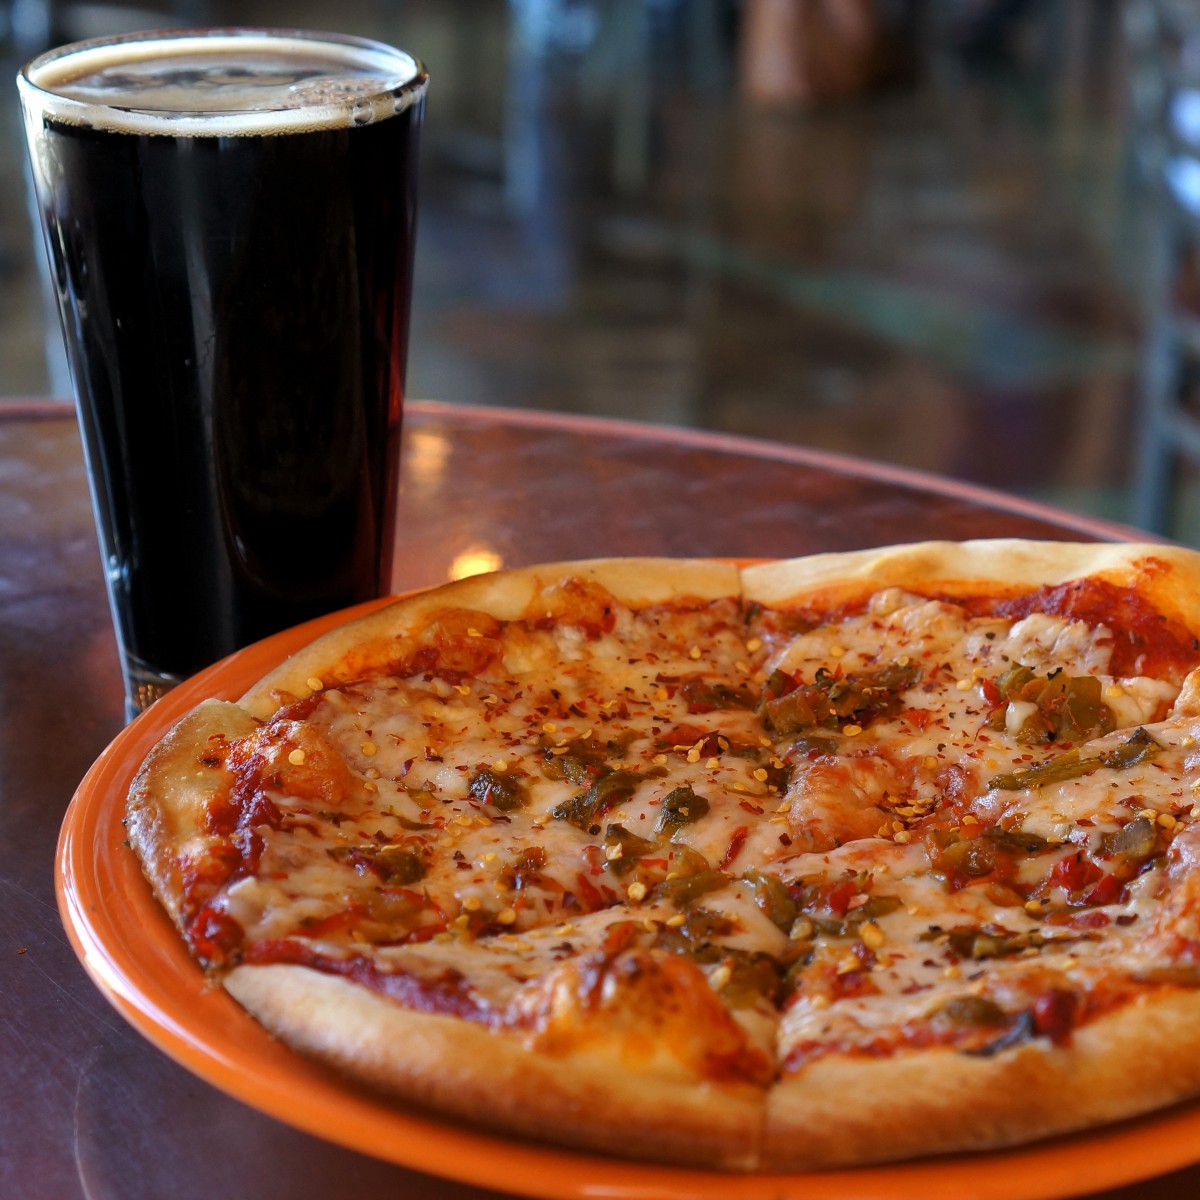
My friend who lives in Fort Collins claimed that this place had the best pizza in the town, and I have to agree. If you find yourself in this area, its a great place to stop and get a bite. The pizza was decadent for a reasonable price, and they staff mostly college students (as a college student myself, I always feel the need to help out my struggling peers). Don’t forget to try the grinders! ~$15 USD a plate.
Cafe Athens (Fort Collins)
As someone who strongly identifies with my greek heritage, it was refreshing to have authentic greek food. The food was delicious and affordable. Their gyros are exceptionally good, and their salads were fresh. I made my travel partners try the baklava and it was delicious and fresh. ~$10 USD a plate.
Experiences
Zip lining
We went zip lining with Denver Adventures, and I would highly recommend them if you are in that area. It was my entire group’s first time zip lining and we all had a blast. As someone who is afraid of heights, I was both terrified and excited to face my fears by pummeling through a canyon on a rope. For about $60 USD each, we went on the longest, the fastest, and the tallest zip lines in Colorado, and it truly was a blast! Wear comfortable shoes and clothes that hug you (so they won’t get caught in the straps of your harness). Everyone in our group wore light jackets and sunglasses and we were happy we did! The sunglasses helped us to see by blocking sunlight and the wind, which made it a much more enjoyable experience.
Plan to drive for quite a ways out to wherever you plan on zip lining, as generally the locations are fairly out of the way. Don’t plan on bringing anything that you wouldn’t want to drop thousands of feet.
Rafting
We went rafting with “Wanderlust Adventures”, for $60 USD for a half day trip. We went on the Taste of Whitewater, but by the end had wished we had done a more advanced tour. It was a general consensus in our group that this was the most fun excursion we had during the entire trip. Even though it was a more subtle, calm trip we all had adrenaline seeping through us and were laughing in joy by the end.
Expect to get wet and cold on this trip, and don’t bring anything you wouldn’t want to get wet! We were ferried in a bus from the business to the river (we went on the Poudre River) which took about an hour. We then did two loops around the river. Expect to be tired by the end of the trip, and I wouldn’t plan on doing anything else after this adventure.
Shambhala Mountain Reserve
Shambhala Mountain Reserve and the Great Stupa, were awe inspiring to say the least. We spend an entire day wandering around the reserve, took a meditation class, and hiked up to the stupa. I don’t believe you need to be buddhist to appreciate the beauty of this excursion. It is quite a drive out to the reserve, so start the day early. There also wasn’t much in the way of food, so eat before you head out or pack lunches. Finding the Stupa can take some time, and its easy to get lost in the reserve, so look up directions on how to navigate through the reserve before setting out. Also, expect your phone to lose service on the way to the reserve, and print out directions before you go!
Garden of the Gods
I will start this by saying we did not carve out enough time for the Garden of the Gods. Though it’s only about an hour to drive through it, to actually appreciate these feats of nature takes much longer. I wish we had planned to spend more time here, so that we could have gotten out and hiked around a bit. Otherwise, the stop is not as awe inspiring as it should be and leads to just a frustratingly slow drive. Plan to hike around for a bit, and get there early so you can find parking to do so! Note that the Garden of the Gods is usually very busy, and traffic can be very slow.
The Cave of the Winds
I felt as though the Cave of Winds was one of those tourist traps, designed to pull money from those who visit there, and we were sucked in to said trap. The rides are incredibly overpriced and completely not worth the money, and the same could be said for the food. We went on the cave tour, and though it was nice, it was not exceptional. The paths have been completely carved for tourists, so there is little adventure, and it is always crowded (With a tour group in front of you and behind you at all times). I wouldn’t recommend this excursion.
Manitou Cliff Dwellings
The manitou cliff dwellings are a set of Anasazi ruins that originated in the Mcelmo canyon (yes, this spot is not their original home). Although it is unfortunate that this is not the original site of the pueblos, it is still an exciting historical spot if you are unable to make it to Mesa Verde (if the pueblos are something you are interested in, this is a great stop! Unfortunately I was not able to make it up there on my trip). You have nearly complete reign to wander and explore the pueblos, with interesting historical artifacts inside the visitors center. Well worth the $10 admission!
I hope you all found this information helpful! Until next time, live free my fellow travel bugs!
For most travelers, the flight to and from your destination is the least liked part of the trip. Airports can be stressful, and airplanes can be uncomfortable and downright boring. However, I have always loved airports (except of course when my flight gets delayed or cancelled). I love the prospect of adventure and meeting new people. I have also always loved the non judgmental culture inside airports. No one judges if you are in pajamas at 4 PM or drinking whiskey at 5 AM.
Flights still can be stressful though, and thats why I have decided to share my tips and tricks for making travel day as easy, cheap, and pain free as possible.
Before you leave
Making travel day easy and affordable starts loooong before you ever actually leave. It starts the day you decide to go on a trip. There are many factors that go into cost and ease of your flight, that have to be taken into account right when you decide to go on an adventure.
Peak Season
Everywhere you visit will have a peak season, which is when the majority of travelers decide to go to that destination. Major holidays, when people have time off of work, will drive prices through the roof. So avoid traveling during major holidays if possible.
Generally, people like to travel to places when the climate of that area is best. So, often you will need to decide between best flight and best weather for your trip. Sometimes the best time to travel to a destination is right before or right after this “prime weather” time. This will be when flight costs lower, but weather is still good enough to be pleasant for your trip. Another plus of this is that it is likely going to be less crowded if you travel at this time. Going during the off season, not during a holiday will give you the cheapest flight prices, but often you are sacrificing the quality of your trip by doing this.
Weather
The weather plays a huge factor in the ease of your travel. During winter time, flights are less predictable and more likely to be delayed or cancelled due to bad weather. You can avoid this by traveling during the Spring or Summer time. However, if you’re limited to certain travel dates and must travel in winter, there are some things you can do to make your travel experience better. The first things are choosing quality airlines and airports, which we will discuss next. The next thing you can do is either buy direct flights, or make your layovers exceptionally long. I generally recommend one hour layovers at minimum for all flights (two for international flights), but double this AT LEAST when flying in bad weather. This gives you a little wiggle room in case your flight is delayed or cancelled. If you are flying in particularly bad weather, it may even be a good idea to have overnight layovers. This will take a lot of stress off of you in the case that something does happen to your flight, and will save you a lot of money in rebooking flights.
Airport
This is something people don’t often think about when booking flights, but choosing the right airport for connecting flights can make a huge difference in how stressful your travel date is. Read the reviews on the airports that you have the option for layover in. In particular, look at things like weather in the region the airport is located, and likelihood of cancellations. Some airports are simply designed to be more efficient and therefore have less cancellations and delays than others. These are things you want to know before choosing a flight. Other things to look at are cleanliness and food options, but in my opinion this doesn’t matter as much as what I stated above.
Note: I would much rather spend a few hundred extra dollars on traveling through a better airport than not.
Airline
Some airlines are better than others, plain and simple. Most people simply buy the cheapest ticket they can without caring about the airline quality. But remember what you’re willing to pay is the quality that you will receive. Bad airlines are more likely to cancel flights, and less likely to reimburse you for said flights. They often also wont help you in the rebooking process and will leave you stranded at airports. Also, bad airlines wont take care of their airplanes to the extent that the good ones do, and therefore are putting your safety in jeopardy. Bad airlines are more likely to overlook issues with the aircraft. These are things you have to think about when buying a ticket.
Though you may save some money by going with a cheaper airline, you will make your money back in tenfold by choosing an airline that is less likely to cancel, and more likely to pay to rebook you. Not only this, but in my opinion the money you save is simply not worth the stress it costs later. Also, with cheaper flights you are sacrificing comfort and service, which make a huge difference on longer flights. Having a TV or a comfortable seat can make the difference between a happy flight or you internally screaming the whole flight.
In the USA, my favorite airline is Delta, and Alaska is pretty good too. I will never fly frontier or spirit airlines again, and most people who have flown with either will say the same thing.
Time
Sunset on California flight
Traveling on weekdays can make hundreds of dollars worth of difference when it comes to flight cost. Generally speaking, Tuesday is the cheapest day to fly (followed by Wednesday and Thursday) while weekends are the most expensive time to fly. The airport will also be less busy on weekdays generally, which can make going through security and getting to your gate much easier. So, if at all possible, always fly on a week day.
The other thing to consider is time of day that you fly. Most people will claim that red eye (overnight) flights are the worst, but I would actually argue the exact opposite. Red eye flights are generally the cheapest option for airfare, simply because so many people avoid them. Not only this, but flying overnight makes it easier to sleep on the plane, which makes flying a breeze and cuts down on your boredom during long flights. Also, generally the airport is less busy late at night which can make traveling much easier, and your plane is less likely to be crowded. Lastly, red eye flights will often get you to your destination in the early morning. This gives you a full “freebie” day of vacation, instead of getting to your destination in the evening and being required to pay for a hotel that night without having experienced anything yet. This is why I am very pro night flights, and opt for them whenever I can. I recommend you do too.
Travel Date
Your date of departure has finally arrived, and you are bubbling with excitement. But first you have to endure your day(s). Airport, security lines, and sitting on a plane. But there are ways to make sure your spirit isn’t dampened.
How the Airport Works
If you haven’t been to the airport before, or don’t remember how it all works, read this section. If you know the basics of the airport, skip this section.
Arrival
When pulling into the airport, there should be three separate roadways. One will lead you to parking, one will lead you to the arrival gate, and one will lead to the departure gate. If you are bringing your own car and don’t have anyone driving you, you will need to head to the parking lot. Note however that this can be very costly – over $100 for a week. If you have someone else transporting you, head to the arrival gate.
Check-in and Checking Bags
Generally when you walk into the airport, there will be separate desks for each airline. If you have a bag that needs to be checked, or haven’t checked in, head to this desk. If you don’t, head directly to security. Often there will be small machines that you can check in on directly in front of the actual desk. These can save you a lot of time by cutting down on wait time. Unfortunately, if you have a checked bag, you will need to wait through the line and talk to the front desk.
Security
Security is often the most time consuming portion of the airport. Have your ID and ticket at the ready for the first phase of the security. There will be employees sitting at desks waiting to check these, before allowing you to go through the machines. Each country has different rules for what is required when going through security, but I will just discuss the general requirements. You will need to place all of your luggage, as well as anything on your person (including metal belts) on a table to be pushed through a scanner. Keep technology, liquids, and clothes pieces in separate bins. This is when you will need to take all liquids, metals, and technology out of your suitcase.
You will then need to go through a machine and be scanned. One thing to make this go smoothly is to make sure there aren’t any folds in your clothing (my issue is always having rolled up jeans), and make sure you have completely emptied your pockets. If you do get stopped, theres nothing to worry about. You will be patted down and checked to make sure you aren’t dangerous. Once they have checked you, you will be allowed to leave. This is when you retrieve your bags and head through.
Terminal/Gate
If it is not labelled on your ticket, you can figure out your terminal and gate by looking at the screens placed intermittently throughout the airport. Find your destination and time, and you should be able to find your gate number on here.
Once you determine where you should be going, it’s always a good idea to head here and check it out regardless of how early you are. It is a good idea to stay in the immediate vicinity of your gate, and find things to do around this area. Once everyone is checked in, the plane is allowed to leave whenever it wants with minimal warning. So you need to be in the area in case they decide to leave early.
Boarding
About thirty minutes before departure, passengers will begin to board. Those with small children or disabilities board first, then first class, then they go down the list of boarding groups. Often they will not let you board early and will send you to the back of the line if you come up early, so stick with your boarding group.
How to do it Right
Checking In
Always check in prior to getting to the airport. Generally, I will check in the night before or the morning of, depending on the time of day I am traveling. Doing this can save you quite a bit of time while actually at the airport, and you can get better seating this way. Make sure you have a printer when you check in!
Packing
The way you pack can make your day more efficient and overall just easier. First is the type of luggage you use to pack. I would say 80%-90% of all travelers use either black or dark green luggage. Do not let this be you! Especially when you check your bag, it can be nearly impossible to find in baggage claim when it looks like every one else’s. It is also easier for people to steal your bag if it is a common color.
Don’t worry if you already have a black or dark green bag and can’t afford a new one. Just get some colorful duct tape or ribbon and attach it to your bag to give it a pop of color that will make it easily recognizable. It is also important to have a tag on your bag that shows your name, phone number, and address in case it is lost.
When packing your bag, be thoughtful of how you organize things. Place all things that will need to be taken out in security on the very top of your bag. This includes any electronics,metals, and liquids. This will make the security line much easier.
Try to pack light when traveling. This can help you avoid checking a bag, which should be avoided at all costs. Checking a bag can add over an hour to your trip, both checking it and waiting for it in baggage claim. This adds time to how long your layovers will be and how early you should head to the airport. They also can be lost in transportation, leaving you without things you will need on your trip. However, sometimes having a checked bag is unavoidable. If this is the case, its a good idea to put all electronics and liquids in this bag so you don’t have to worry about carrying it through security.
Generally, you are allowed to bring one carry on bag and one personal item onto the plane. Pack your personal item intelligently. I recommend a backpack rather than a shoulder bag or purse, since it is easier to carry and won’t fall off your shoulders. In your personal item you should carry anything that you will need while on a plane. I usually carry an empty water bottle (fill it once you get through security), a book, a jacket, my laptop, earbuds, and my ID/wallet.
What to Wear
Me in Grand Cayman, about to head into the airport.
Comfort is key when you are traveling. You will be walking long distances around an airport, and will be sitting for a long period of time. The temperature in an airplane can range from very hot to very cold, so its good to be prepared for either. I generally wear less covering clothes but bring a jacket in my backpack in case it gets cold on the plane. Tennis shoes or sandals are a good idea for footwear. Keep in mind that you will likely need to take your shoes off for security, so wear something that will be easy to put back on. Wear comfy pants that aren’t restricting to sit in, something like the running pants I am wearing in the picture above.
Timing
Timing is everything when it comes to flying. Arriving to the airport late can lead to miss flights, while arriving too early can lead to huge periods of boredom. Of course, the latter is much better than the prior, but still isn’t ideal. My general rule of thumb is arriving two hours early for domestic flights, and three hours for international flights. However, this can vary based on the situation. Do your research on the airport you are flying through and the time you are flying. See how busy it generally is at the time you are flying, and plan accordingly. Getting through security can take from ten minutes to two hours, so knowing how busy it is and how efficient the airport is can be essential. Generally, the airport is quite busy in the morning and midday, but calms down towards the evening. Although, this isn’t always true.
After The Flight
There are some considerations to take when planning your day after you arrive. Flight cancellations and delays can push your arrival time back hours, or even days. For this reason, it is a good idea not to plan anything on your day of arrival, especially anything that you need to pay for ahead of time. Generally I plan to get some groceries and get acquainted with the town I am visiting for my first day. I have lost plenty of money planning and paying for activities on my first day, and then having flights cancelled or delayed. Learn from my mistakes and take it easy!
I hope you all found this information helpful! Until next time, live free my fellow travel bugs!
Cozumel is an island off the coast of Mexico, a short thirty minute boat ride from Playa del Carmen, and adjacent to Cancun. This island is in the caribbean, near Cuba.
Most are pleasantly surprised by the warm climate they find in Cozumel. I have been here twice, both times in December. At this time you will be warmed by mid eighty degree weather. Don’t worry about humidity – its a nice dry heat only broken by jumping into the crystal blue waters that surround you.
One unique aspect of Cozumel for the water lovers out there is the current around the island. There is a natural phenomenon that causes the current to flow around the island. This wonderful current flow allows for aquatic life to thrive, and for the water to remain crystal clear year round.
What To Pack
Both times I have gone to Cozumel, I have stayed for a week. This is what I packed on my most recent trip:
Clothes:
One pajama set
Two pairs of shorts
It is pretty consistently warm in Cozumel, with very slim chances of rain. Cool clothes are the way to go!
One pair of jeans
I always bring one pair of jeans when I travel, just as a form of insurance. A “Just in case”. If it gets cold or you’re wandering about at night or in early morning, its good to have a pair of longer pants. Happy to report i did not need to wear them on this trip however.
Four Tank Tops
T-shirt
I always bring something with sleeves for the inevitable time in the trip where my shoulders get burned. Luckily, I didn’t get burnt on either of my trips.
Two Swimsuits
I always bring more than one swimsuit, that way I can trade off and always have a dry one. You’ll need multiple swimsuits for this trip!
Undergarments/socks
Two Pairs of flip flops
One Pair of Tennis Shoes
Though There are not a lot of hikes to do in Cozumel, if you do plan on going to the mainland during your trip at all, its a good idea to have a pair.
Exercise Pants
I always bring exercise pants for the same reason I bring tennis shoes. But they are also awesome to wear on planes, and you wont need to immediately change once you get off the plane.
Dress for formal evenings
There are some higher end restaurants in Cozumel, which I will discuss later in this article.
Rash Guard
I packed this namely for diving and snorkeling, and I was glad I brought it. A rash guard is perfect for diving here, since the water is so warm.
Sun Dress
Sun dresses are a go to fashion choice in Mexico for day wear. They’re easy and comfortable to wear in the heat.
Other:
Passport/ID (Don’t forget!)
Diving/Snorkeling Gear
As someone who does a LOT of snorkeling and diving on my trips, it made sense for me to invest in my own gear. If you do snorkel and dive a lot, I recommend investing in your own gear as well, as it saves you money in the long run. However, if you just want to go out for a day I will talk about different rental options.
Health and Beauty Products
Sunscreen
As a fair lady myself, I need sunscreen for me not to burn. Its important to protect your skin – not only for the longterm effects and cancer prevention, but to not ruin your vacation as well. The best way to ruin your vacation is by having a horrid sun burn.
Bug spray
I made this mistake on my first trip to Cozumel. There are sand fleas on some beaches, and their bites are NASTY. A travel partner and I both were dealing with the after affects for weeks. If you are someone prone to bug bites (and even if you aren’t) a good spray down is a very good idea before hitting the beach.
GoPro with all attachments
If you are serious about travel, a go pro is a great investment. I have an older version that works great.
Underwater Camera
We have a great Olympia brand underwater camera that we take on all of our tropical travels. It works great for snorkeling or cute water pictures!
Where to Stay
Cozumel is a fairly small island, but it packs a punch when it comes to diversity and difference in local, even though the majority of the island is undeveloped.
We stayed in a fantastic condominium building called Palmas Reales, in a condo owned by a man named Fulvio called Blossom (If you’d like to contact him ~ fulviocozumel@gmail.com). This condo is located just north of the downtown region, near a cute little beach called Playa Azul. It was perfect for our group due to its large size and affordability. I will note that there is not an accessible beach at this condo, but there is a ladder that leads you directly into the water, to what I would consider to be the best snorkeling on the island. The location of this condo was perfect for our uses, because it was an easy taxi drive to downtown but away from all the craziness of cruise ship passengers.
The first region you are likely to visit is the west side, where the cruise ships come in. This is the main downtown area in Cozumel, and hosts nearly all of the nightlife for the island. This is a great area to grab a bite and some drinks, and to go shopping. There are some large hotels and resorts in this area, but I personally would not stay immediately in the downtown hub. You can get cheaper accommodations with better beach access a little ways away. Note that the cruise ships namely come in on the weekends, and this downtown hub will be crammed with tourists and peddlers during this time. It is important to note that this is also where the ferry that will take you to the mainland is located.
Immediately north and south of the downtown hub have great options for hotels and vacation condos. This is also where you will find some of the best offshore snorkeling and diving on the island. These areas have some great beaches within walking distance, that have bars and good food. However, the nightlife and shopping options in these areas are slim compared to the downtown hub.
The East side of the island is a completely different world from the West side. In 2005 Cozumel was hit with two category 4 hurricanes that wiped out power on the east side of the island, and there hasn’t been much effort to restore said power. However, that hasn’t stopped the locals from making the east side a fun place to visit. The sandy beaches on the east end are littered with funky little bars and restaurants. Although it isn’t safe to swim on this sided of the island, the beaches are sublime and great for sunbathing with a drink. There aren’t many housing options on this side of the island however, and lack of power may turn many off of staying there regardless. However, it is a fun day trip.
Getting Around
I do not recommend trying to rent a car in Mexico unless you are from the area and are accustomed to the driving. Road laws are not regularly enforced here, and it can be very stressful and even dangerous to drive here without experience. Roads are also generally in a state of disrepair and signage can be lacking. Not to mention, it is pretty expensive to rent a car here. There are much more effective, safer ways to get around Cozumel.
The taxi system in Cozumel is very efficient. You will see taxis basically anywhere you want to go. They will be plain white vans/cars that you can signal down from anywhere. This is also generally pretty affordable, even if you are traveling a long ways. My recommendation is: when you find a cab driver you like for whatever reason, ask for his or her phone number and just call them an hour before you plan to leave. Not only is this perfect for when you have scheduled events that you need to be to at a certain time, and better for when you plan on doing day trips, but also this is a great way to get to know a local and learn even more about the culture. If you do this on your first day, you will likely be buddies with your cab driver by the end of the week and will gain so much more from your trip. Some of my companions go to Cozumel annually, and have actually saved a particular cab driver’s number for all of their trips.
There are also some city buses, however not as prevalent in this area. though this can be somewhat cheaper than taxis, I wouldn’t recommend using these either. They are not quite as safe as the taxis, and simply aren’t as efficient for getting around.
Food
One of my favorite things about visiting anywhere in Mexico is, of course, the fantastic, fresh, authentic Mexican food. I am a sucker for any type of Mexican food. Beware, however, that once you eat Mexican food in Mexico, all other attempts at replicating the cuisine may be ruined for you forever. So munch at your own discretion. Also, food here is VERY cheap. It’s possible to spend less than $10 USD on a plate of food and a drink here at most restaurants. So, I will start this section by saying that I have not had any bad food in Cozumel, but I’ll talk about some of the places I’ve eaten.
The Buccanos at night
Don’t come here unless you are willing to spend a pretty penny, as food here is quite expensive. All of the food is prepared directly by the head chef, and because of that you need to reserve a spot to dine. But let me be clear when I say the food is phenomenal. It isn’t exactly what I would call authentic Mexican cuisine – more seafood. But everything was very fresh and very good. Not only this, but you are steps away from a quiet beach front, and get to listen to the sounds of the waves as you eat. And who doesn’t like that? If you are looking for a high end night on the town, this is the place to be. Prices will range from $20-$30 USD a plate.
La Mission
Slightly less high end than The Buccanos, you will find La Mission downtown, tucked away down a street off of the main roadway. Again, the food here is fantastic, and quite cheap (though not the cheapest you will see on the island). One of my travel partners had the coconut shrimp our first time in Cozumel, and still raves about it today. The guacamole is also very good, and fresh. Not only this but you will find fun nightlife here, with music and drinks. Prices here will range from $10-$20 USD a plate.
Woody’s
Woody’s was one of my personal favorites, and not particularly due to the food (although, again, still quite good). The nightlife here is awesome. They have live music most nights and opportunity for dancing, which for me is always a plus. Also, their drinks are very good and will keep you dancing all night! Although not the best place if you are specifically looking for a bite, its a great place to hang out. Prices will be around $10 USD a plate.
Culture Shocks
Note: Differences in culture are based on my own cultural experiences, and therefore are based on what a US citizen would be shocked by. I apologize for this one sided view, but of course I am unqualified to note differences in culture for other cultures/countries, as I am only a visitor to those countries as well.
Money
The Mexican Peso is worth considerably less than the American Dollar, which can shock first time visitors (Seeing 50 for a beer can make some shake in their boots). Not only this, but the Peso is losing value all the time. Just over my years of traveling to Mexico I have seen the value of the peso cut in half. You are also likely to see different exchange rates at different stores, so be cautious. If you have USD, then most places will accept it, and many prefer it due to it being more stable than the Mexican Peso. I would recommend that unless you are going to be very conscious about the exchange rate, stay in USD (if that is your native currency). Shopkeepers will not make you aware if you overpay them in pesos, and will consider it a “tip”.
Language
As you most likely know, the native language in Mexico is Spanish, and although almost everyone in Cozumel knows English, I HIGHLY recommend brushing up on Spanish. Many times, natives will pretend to be confused by what you are saying in English for their own benefit. Besides, you want to be prepared on the off chance that you need to interact with someone who doesn’t know your language. It is okay not to be well versed in the language, as in most of my experience natives have been more than patient with my broken Spanish. Many appreciate the attempt. I speak decent Spanish, and it has helped me on every trip I have taken to Mexico, not to mention all the money I have saved my travel group by catching swindlers speaking in Spanish.
Phrases to Know:
1 to 10
“How Much?”
“I would like”
“to go”
“to eat”
“to buy”
“Where is”
“the bathroon”
“The store”
“The Hotel”
“The beach”
Common foods, locations, and items
The Family Culture
Hispanic culture is hugely centered around family. Family members help one another, and remain very close to one another, a trait I have always been envious of. This disposition does not stick just between the family however, but spreads out into the work force as well. Natives rely on their network and connections to survive and make money in Cozumel (and throughout Mexico), and it is something that you, as a tourist, should be aware of during your stay. If you ask your taxi driver where a good place to eat is, he is going to take you to a specific restaurant to benefit his inner group of connections. And if you asked the host at that restaurant to call you a taxi, they are going to call that specific taxi driver to benefit him. This generally is fine, but it is something to constantly be aware of, because often they do not have the tourist’s best interest at the forefront of their mind. The restaurant may be more expensive than a place right next door that serves the same food, and the taxi driver may not be the closest one to you. As a good rule of thumb, do your own research on activities and restaurants so that you may be more knowledgeable and harder to take advantage of.
“The Bargain”
As with most places in Mexico, the price you see is not the price you need to pay (except for large grocery stores, restaurants, and international chains). Shop keepers put up more expensive prices in hopes that the average tourist will be caught unawares and pay full price, but they do not expect to be paid that much. Learn the art of the deal, and barter with the shopkeeper to get sometimes more than half off the listed price.
Peddlers
Cozumel’s peddling problem is mild compared to other regions of Mexico, but still present. People may come up to you with wares and try to sell you, or mariachi bands may come up and play in attempts to get tips. If you are uninterested in the service or product, you must make that clear at the start of the interaction, then discontinue interaction immediately. As long as you keep interacting with them, they will continue to try and sell to you. Another major note with this is to NEVER buy from child peddlers. These children are pulled out of school to go sell to tourists, and we as tourists must stop buying from them in order to do our small part in getting these children back in school.
Most tourist destinations in Mexico are catered to drinking. You can get a good drink basically anywhere you stop in Cozumel, and it is normal for tourists to start drinking earlier than they would at home. The drinking age in Mexico is 18, however this is NOT enforced whatsoever. The informal rule is if your head reaches the bar, you can drink. Tequila is the known drink of choice in Mexico, but remember to drink responsibly!
Experiences
The Beaches
All over you will find beaches with bars on them. My travel group’s personal favorite was Plaza Azul, mostly because it was near our condo and fairly quiet. However there are many different beaches to lay out and sunbathe while drinking a margarita. I will comment on some of them below, but the map above has more of them listed.
Playa Azul:
Playa Azul is a beach near the north side of the island with wonderful snorkeling, good food, and good drinks. Generally quiet, as it is outside the cruise ship range.
Sunset Beach:
Sunset beach is near the downtown region of cozumel, and also has some good snorkeling/diving. Food and drinks here, as usual, are quite good and cheap, with happy hours from 1-3 and 5-7. However, you will find this beach to be quite a bit busier than some others due to its local.
Playa Uvas:
A nice beach also near downtown, with snorkeling offered. However, this is a common day spot for cruise ship passengers and is designed as such. Costs $15 to enter.
Paradise Beach:
(Note: We personally have not visited Paradise Beach, it isn’t our scene but I felt it was worth mentioning)
This is another popular day trip for cruise ship passengers. It is designed for water sports (as you can see in the picture) with inflatables and toys. So could be a good spot for those with kids. Also has food and drinks available. Costs $3 to enter with a required $10 spent at the restaurant. Its $18 to use the inflatables.
East Side
A day trip to the east side is something I would consider a must do while in cozumel (if all those in your group are able and willing to drink). There are unique bars littering the beaches on this side of the island, and the “vibe” is completely different than the west side. With no power, everything is much more laid back and authentic. Also, you won’t get all the craziness from being near the cruise ship port.
The best way to travel to this side of the island is by taxi. Get a taxi driver and tell them you will pay to have them bar hop down the east side of the island. This cost us about $100 for a large van for the entire day. The drivers enjoy this because it is guaranteed money and they don’t have to try to get new passengers. Also they often get free drinks and food from the bars for bringing your business (see: “the family culture”).
The first bar you happen upon will most likely be Mezcalitos Last Frontier. I enjoyed this place because of their hammocks on the beach. It was pretty nice to chill in a hammock with a great margarita for a while. They also have a nude beach in front, though I haven’t seen anyone partake in the festivities myself.
The next bar that will come up is actually a beach club called Punta Morena. We didn’t stop here but from what I’ve heard it may actually be possible to swim here due to the rocks blocking some of the waves.
Coconuts is a must stop on your trip down the coastline. It is up a staircase surrounded by palms, overlooking the ocean. It has a very fun atmosphere and great drinks and food. You’ll feel like you’re walking through a jungle as you enter, which is pretty unique since Cozumel has a more arid climate. They also have an interesting book full of pictures of various customers’ “coconuts” for your viewing pleasure if you wish.
Bar Miami isn’t necessarily a place to stop and eat, but their drinks are made fresh and are absolutely delicious! This is a great stop on your trip.
Freedom in Paradise will probably be the last stop you make on your east side tour. This great Jamaican/ Bob Marley themed bar has wonderful food and drinks, and a great outdoor area to sit and relax on the beach.
Chankanaab
Although my companions and I have opted not to visit Chankanaab, I believe it is still worth talking about. It is technically a cenote, but has grown to basically a theme park. Admission is $23 USD for adults, and $16 for kids. There are a lot of interesting things to do here, including snorkeling and diving, mayan ruins, a park, swimming with dolphins, etc. It is supposedly very busy and catered to tourists, which wasn’t our scene but could be fun particularly for families.
Punta Sur
We were told by many that Punta Sur was the place to visit in Cozumel, so we took the trip while there. Honestly, I was not particularly impressed. The snorkeling was mediocre at best, and bad compared to basically anywhere else on the island. The beach was nice, and food and drinks were okay, but in my opinion you can get the same thing anywhere else on the island without an entrance fee. We did make an effort to go see the crocodiles, but didnt see anything after an hour of waiting at the tour. I will say the lighthouses were pretty, but still not worth the entrance fee for me. If however you still are interested in making the trip have a taxi driver come with you and stay the day (similar to getting to the east end) as it is harder to find taxis at this region of the island, and there are a lot of destinations within the park. Admission is $16 for adults and $10 for kids.
The Main Land
If you run out of things to do in Cozumel (unlikely) a trip to the Mainland can be fun. There is an accessible port that has ferries going to and from Playa del Carmen from 7AM to 11PM, every hour on the hour. These ferries cost about $10 USD and take about 45 minutes (You can find more information here: https://www.cozumel-tours.com/cozumel-ferry-schedule.htm ).
There are some things to know about the mainland before you travel there, if you haven’t been in mainland Mexico before. It is quite different than Cozumel, and can be a little intimidating to inexperienced travelers. Expect to need to deal with peddlers a lot more than in Cozumel, and people may or may not offer you drugs. It is also not quite as safe as Cozumel (though still safe if you take reasonable precautions). Don’t walk around by yourself, don’t take drugs or alcohol from those who offer it (duh), and don’t follow anyone, regardless of what they say. Have a plan and know where you are going before getting there. My last recommendation is to not travel in tour buses. This may seem like a great, easy option, but these buses are nearly the sole victims of cartel attacks in Mexico (it is still unlikely to occur, but better to not risk it). It is much safer and in my opinion better to hire a private shuttle van to and from wherever you are looking to go.
A small recommendation is when you get into Playa del Carmen, if you have time stop at Señor Frogs – do it. This is my favorite bar chain in Mexico, and the one in Playa del Carmen is quite large. Its a fun place to stop and get a drink.
Cenotes
A cenote is an underwater cave, and they are fairly common in Mexico. They range from swimming holes to snorkeling sites to solely dive sites. They are EXTREMELY cool and I would recommend visiting one if you have the chance.
The only cenote I have personally seen (unfortunately) is the Gran Cenote. This was more of a swim site than I had expected, but was still very fun to snorkel. This was one of the few times I have been freshwater snorkeling, and it was fun to see some Molly’s and even a few smaller catfish. This would be a perfect spot for families or groups with dissimilar interests, because part of the group can swim while the other snorkels.
Other Cenotes near this Area:
Cenote Carwash
Cenote des ojos
Casa Cenote
Cenote Casa Tortuga
Cenote Calavera
Cenote Angelita
I have added some pictures of a few of the many cenotes near this area of Mexico. Cenote Casa Tortuga is actually three separate cenotes, one being an open cenote. Cenote Carwash is a more open cenote with a huge variety of fish and plantlife. Cenote Angelita is a cool dive site where dead leaves create a gas that appear like a bottom with trees poking out of it. I won’t say much else about them since I haven’t personally been to any of them, but here are some options for you all to explore!
Tulum
I knew that on my second trip to Cozumel, I needed to see some Mayan ruins. As a history buff, it had always been on my bucket list. My companions were not comfortable traveling to Chitchen Itza, due to recent safety reports and because the drive is about three hours once you reach Playa del Carmen, so we compromised and traveled to Tulum. At first I was disappointed with not seeing Chitchen Itza on this trip, but I quickly learned that Tulum was nothing to scowl at. This beautiful Mayan ruins is located about two hours drive from Playa del Carmen, right on the beach. The ruins are in good condition and exciting to view. Not only this, but the town is unique and has a fun culture. Here is a good place to see the dance of the fliers, which is a must see when you travel to Mexico.
Admittance is only a few dollars, and once you get in hop on the trolly that takes you to the main entrance (otherwise its a pretty long walk). You can pay to have a tour guide but we opted to adventure around on our own (you can always listen in on other tours if they are talking about something interesting). Bring sunscreen, because it gets pretty hot, and keep an eye out for iguanas!
Diving and Snorkeling
You would be hard pressed to find bad snorkeling or diving in Cozumel. The water is full of fish and coral alike, and you will likely see some turtles. As explained before, Cozumel is unique in the fact that its current wraps around the island, bringing clean water and nutrients to the coral and fish life.
Papa Hogs was recommended to us by a friend for all snorkeling and scuba, and they did not disappoint. We were only able to snorkel on this trip due to some of our group not being scuba certified, but the experience was still wonderful. We went with a guide named Manuel, who was able to free dive down to nearly sixty feet just for us to get some good pictures of aquatic life. Also, food and drinks were included in our trip and the food was wonderful. I have also heard good things about ScubaTony.
As far as dive/scuba rentals go, you can get equipment all over the island. Whether or not it is good equipment is up for debate. Ive heard good reviews of Deep Blue. We rented from Black Shark and I wouldn’t recommend them again. The gear was old and worn. If you arent planning on doing any snorkeling or diving besides paid trips, just rent gear from the place you are going with.
I hope you all found this information helpful! Until next time, live free my fellow travel bugs!
The Cayman islands can be found directly west of Jamaica and south of Cuba, smack dab in the middle of the Caribbean. Its about a two hour flight from the southern region of the United States.
When you step off of the plane, it is likely that you will be hit with a tropical heat wave, the kind that warms your cheeks and makes you immediately start to sweat. We headed for the Caymans in December, which is technically their winter time, but temperatures were an average of 85 degrees fahrenheit (29 degrees celsius). There were sporadic tropic storms, with warm rains and windy conditions during our stay. But for the most part, it was warm and sunny – enough to tan your cheeks.
What to Pack
I stayed for a week in the caymans, and here is all that I packed:
Clothes:
One Pajama set
Two pairs of shorts
Its very warm in the Caymans, even when it is raining. Its good to have cooler clothes.
One pair of jeans
I always bring one pair of jeans when I travel, just as a form of insurance. A “Just in case”. If it gets cold or you’re wandering about at night or in early morning, its good to have a pair of longer pants. Happy to report i did not need to wear them on this trip however.
Four tank tops
I actually probably could have gotten away with only two or three tank tops on this trip, but I always overpack.
One T-shirt
I always bring something with sleeves for the inevitable time in the trip where my shoulders get burned. Came in handy!
undergarments/socks
Two swimsuits
I always bring more than one swimsuit, that way I can trade off and always have a dry one. You’ll need multiple swimsuits for this trip!
Two pairs of sandals
I always bring one comfortable pair to walk around in during the day, and more “glam” ones to wear for a formal evening.
One pair of tennis shoes
I love to do hikes and adventures on my trips, so a pair of quality, comfortable tennis shoes is required for all trips. If you plan on hiking the mastic trail or the crystal caves these will be a need!
One pair of exercise pants
I always bring exercise pants for the same reason I bring tennis shoes. But they are also awesome to wear on planes, and you wont need to immediately change once you get off the plane.
One dress for formal evenings
We tend to do one nice dinner out during our travels, so I always bring one nicer outfit for the evenings and nice dinners.
Windbreaker
I packed this as an insurance piece, just in case it got cold or wet, and I was very happy with the choice. Sporadic rainfall does occur in the Caymans, and its nice to have a light waterproof jacket.
Rash Guard
I packed this namely for diving and snorkeling, and I was glad I brought it. A rash guard is perfect for diving here, since the water is so warm. Some people wore a 3 mm wetsuit, but I honestly did not see the need.
Other:
GoPro with all attachments
If you are serious about travel, a go pro is a great investment. I have an older version that works great.
Underwater Camera
We have a great Olympic brand underwater camera that we take on all of our tropical travels. It works great for snorkeling (though doesn’t work deep enough for diving). You will see some of the photos in this blog!
Drone (that I forgot to use, my bad)
A drone is another great investment if you are serious about traveling. It is an awesome way to get scenic views of the area you are visiting.
waterproof bag
If you are a water bug like me, a waterproof bag is a great investment (they don’t cost all that much). They work well to keep clothes and electronics dry for boating, kayaking, paddle boarding, and the like.
Passport/ID (Don’t forget!)
Diving/Snorkeling Gear
As someone who does a LOT of snorkeling and diving on my trips, it made sense for me to invest in my own gear. If you do snorkel and dive a lot, I recommend investing in your own gear as well, as it saves you money in the long run. However, if you just want to go out for a day I will talk about different rental options.
Health and Beauty Products
Sunscreen
As a fair lady myself, I need sunscreen for me not to burn. Its important to protect your skin – not only for the longterm effects and cancer prevention, but to not ruin your vacation as well. The best way to ruin your vacation is by having a horrid sun burn.
Bug spray
For some reason, bugs adore me. Im not quite sure if its my blood type or rum consumption while on vacation, but they just can’t seem to leave me alone. For this reason I have learned to bring bug spray with me on all trips. Its a good idea to have some on all tropical vacations regardless.
Where to Stay
We stayed in a cute little hotel near Bodden town called Turtle Nest inn. It was right on the beach, quite affordable, and came with a small car rental included. They also had a grill, and a lot of water sport rentals (Kayaks, paddle boards, the like). Though my bed was not comfortable, I would stay there again due to location and amenities. Though next time I may bring a mattress pad or a blow up mattress. They also have some of the best offshore snorkeling I saw on the island (though you have to snorkel past some foggier water with seaweed to get there). If you do happen to stay here, veer towards the right when snorkeling and you will end up on an amazing, massive coral reef.
OLYMPUS DIGITAL CAMERA
There are different regions of Grand Cayman, all with their unique flavor. Bodden town was a quiet town with a grocery store and a few smaller restaurants. Though it wasn’t particularly special, we chose to stay here due to location. It is about a 30 minute drive maximum to any point on the island from Bodden town, which made exploring the unique regions of Grand Cayman easier.
Seven Mile Beach is considered the busier part of Grand Cayman, and this is true. However, this “busy” is very mild in my opinion, being about as busy as any medium sized large town would be. Contrary to what you may hear, seven mile does not host the cruise ships and cruise passengers. The majority of the people you will meet in Seven Mile are vacationers or residents. The water here is phenomenal as well, being gorgeously crystal clear. However, it did not appear as though the snorkeling here was that great, with more sandy beaches than reefs. The majority of high end restaurants you will see are in Seven Mile, and the higher end resorts and hotels are mostly located here as well. All in all, a great place to relax, swim, and drink. But for my group it was out of our price range as far as lodging went.
George Town is also a fairly large town. It is a little less busy and more organized compared to Seven Mile beach. This is also where the airport is located, so a good home base location for those who like that. However, the cruise ship port is also in this area, and we did our best to avoid that area entirely. It was crowded and dirty compared to the other regions of georgetown, with peddlers trying to sell their wares to the people getting off the ships (Something you won’t see in any other part of Grand Cayman).
Camana Bay was clearly the playground for the wealthy. The clean, polished streets were lined with fancy boutiques, restaurants, and bars that you couldn’t hope to walk into without spending $200 USD. The buildings were all very new and clean, and sidewalks were lined with perfectly trimmed foliage. There is also a man made island in the center of the bay with hammocks and benches, perfect for a relaxing afternoon. If you have the money, this would be a phenomenal place to stay. However, if you’re traveling on a budget as I am, it may be a better afternoon getaway.
Rum point was an exciting region of the island. With calm waters, sandy beaches, great snorkeling, and fun bars, I felt right at home. This was the other region of Grand Cayman that did have some affordable options for hotels and condos. A little more quiet, reserved, and cultural than Seven Mile Beach or George Town, this is a great spot for those who don’t need to be surrounded by fancy restaurants or huge resorts.
The East End was the last region of the island we visited. It is very isolated, with mostly locals and residents in the area. The ocean appeared to have some great snorkeling, but was far too rough when we went for us to check. There weren’t very many options for hotels in the area, but a few smaller ones reside in the area. There are some unique restaurants littering the road, with some local food that is slightly more affordable than that found in Seven Mile or Camana bay. This would be a calm, relaxing place to visit if you weren’t in need of any fancy dining or bars, and were really looking to immerse yourself in the culture.
Not my photo, but useful nonetheless
Food
Compared to dining in the US or the majority of my other travel ventures, food in Grand Cayman is EXPENSIVE. 10 USD for a drink and 30 USD for a meal was the norm for your average restaurant. This is due to the cost of importing much of the food into the island. Due to this, we had to improvise a bit. To save some money, buy food to eat some of your meals at your hotel/condo. The best way to buy food on the island is to buy local food. Fruit stands litter the roads with very affordable fruits, veggies, and jams. On Saturdays there is a huge farmers market near Georgetown with affordable produce (you can find the address by simply typing “Farmers Market” into google maps). Grocery stores are also a fair option, but are more expensive than the local farmers. Meats are fairly expensive here as well, with the most affordable being chicken (You’ll see why once you get there). It is also worth noting that the majority of restaurants in Grand Cayman are very Americanized. We had trouble finding delectable island cuisine on our trip.
With that in mind, here are some of the restaurants we visited during our time on the island:
Chicken Chicken is located in Seven Mile Beach, and actually had some yummy, affordable food. They slow roast chicken on a rotating spicket that you can see when you walk in the door. The chicken is quite good, and the sides are agreeable as well. The cornbread is island style and VERY good. The average meal was $10 USD, which is very affordable for the island. All in all, a great stop for an affordable lunch or even dinner.
Peppers is a restaurant near Seven Mile Beach as well. The meals were your typical 30 USD a plate, and 10 USD a drink, but the atmosphere was fun and unique. The food wasn’t anything to cry home about in my opinion, but it was good and filled our bellies.
The Lighthouse is in between Bodden Town and East End, and had what I would consider to be the best food we ate on our trip. A higher end location where meals were easily 40 USD a plate, the food was good, and had a dash of island flair. There was more culture in the food here than we had eaten at any other higher end restaurant. Also, the view was amazing!
We also ate at the Harbour Grille Restaurant in Georgetown for breakfast, which had amazing breakfast foods (I can only hope this quality reaches over to their lunch and dinner menus). The interior is also very cute, with blue and white beach themed decor. Though still fairly expensive, I would recommend this location!
Culture Shocks
Note: Differences in culture are based on my own cultural experiences, and therefore are based on what a US citizen would be shocked by. I apologize for this one sided view, but of course I am unqualified to note differences in culture for other cultures/countries, as I am only a visitor to those countries as well.
Left Sided Driving
Unlike in the US, you drive on the left side of the road in Grand Cayman. Though we knew about this before we went, it was still an adjustment for our whole group with a few near death experiences as we adjusted. There are also very few intersections in Grand Cayman, with most being replaced by round a bouts. Make sure you are comfortable with round a bouts before you try driving there. Also, it was strange as a US citizen to see people honk as a “thank you” rather than a “screw you”, so be prepared for that as well.
Chickens…. Chickens Everywhere.
There are wild chickens EVERYWHERE in the Caymans. They are perfectly harmless for the most part, and just wander around looking for food you may drop. But still, it was bizarre for me to see. Try to catch a glimpse of the baby chicks when you can, since they are generally well hidden with their mommas. I enjoyed them quite dearly, and actually managed to pet one by bribing it with food.
Money
The Cayman Islands have their own currency, the cayman islands dollar, which is similar in value (but not the same) to the Euro. 1 CI dollar is approximately 1.15 USD. Note that the ONLY currencies accepted in the Cayman Islands are the CI dollar, and the USD. So be ready to exchange money if you do not carry either.
Cuisine
As I said before, the food in the Cayman Islands is very Americanized. However, there were a few things that were unique to the region. Jamaican Jerk chicken is one of the popular dishes in the region, and is a go to for lunch or dinner if you want a guaranteed decent meal. Its chicken rubbed with a spicy Jamaican jerk sauce, then generally cooked over a wood fire or in a wood fire stove. Mango sauces are also common sauces for a plethora of meals, including bread dishes and meat sauces. It is exciting to try the different kinds that restaurants have. The other food I noticed was plantain dishes, and breadfruit dishes, both of which I have only experienced in tropical regions and are worth a try.
The People
There was a unique and beautiful blend of people that reside in the Cayman Islands. Many had immigrated from the nearby countries, such as Jamaica, Cuba, and the Dominican Republic. But we also met a plethora of people from far away European and African countries that had travelled to the Caymans and fell in love, so they never left.
Experiences
Stingray City:
Though very touristy, Stingray City is an unforgettable, must do experience. The stingrays are all wild, free stingrays that are by no means forced to stay in the region, but rather choose to stay due to the promise of easily accessible food. About 60 years ago, fishermen began to dump excess bait in this region so that they would not attract insects to the docks by dumping it there. By doing this, they began to attract stingrays to the area, who would eat the scraps. Older stingrays such as the one I am holding in the photo below taught younger stingrays to come here for an easy meal. To avoid the massive crowds, try to go either early in the morning or later in the evening, and avoid the weekends when the majority of cruise ships are in. We did both stingray city and the bioluminescent bay on the same trip, so we went later in the day and were only accompanied by about 4 other boats. We went with Adventura Cayman, on a private trip for $550 total (for both Stingray City, a snorkel tour, and the Bioluminescent bay) and they were a great tour group.
Bioluminescent Bay:
Since there are only 14 Bioluminescent bays in the world, I knew I had to see this one while we were in Grand Cayman. It is a once in a lifetime experience, truly, and was absolutely phenomenal. DO NOT MISS IT. We went during a full moon week, and because of this there were no tours going to the bay (the full moon apparently lessens the view of the bay), which is why we decided to do a private boat tour that would take us to the bay. Honestly, even with the full moon it was extraordinary, and I liked the fact that we had the entire bay to ourselves. There are a few ways to see the bay: snorkeling, kayaking, and glass bottom boats. We snorkeled, and I would recommend doing it that way, since it is the only option that actually gets you in the water with the plankton. The pictures do not do it justice, but I will show them anyways.
Other:
Though we didn’t get the chance to do these things, I would still recommend exploring them yourself:
Mastic Trail
Crystal Caves
Botanical Garden
Note: The Turtle Farm in Grand Cayman is also a popular tourist attraction. They do some turtle rescue and breeding for release, however they do still run a turtle farm and provide turtles for commercial purposes. For this purpose I chose not to go there, and won’t recommend others to do so. However, I do acknowledge the conservation efforts of the company, and respect other’s decision to go there.
Diving/Snorkeling
The reefs in Grand Cayman are massive and colorful, squeezed pack full of colorful reef fish. Some of the larger, more unique creatures you can find are turtles (loggerhead, greens, and Hawksbille), Southern Stingrays, Eagle Rays, and Nurse Sharks.
The offshore snorkeling I saw was nothing to cry home about, although there were some cool areas in Rum Point and Bodden Town. The real amazing snorkeling and diving is about 25 yards offshore, where the massive coral reefs start. As I said before, near Turtle Nest Inn in bodden town has some amazing coral reefs that are accessible through a fairly easy swim, and same with Rum point, although both areas you have to swim through a murky, algae coated area to get to the good stuff.
Farther out, there are some amazing, massive coral reefs. One trip we went about 80 yards offshore near rum point to snorkel, a place called starfish point by our guide, which had good visibility and exciting coral. It was my first time snorkeling in the evening, and we got the unique opportunity to see Midnight Parrotfish spraying eggs on the reef and ocean floor.
I also got the opportunity for a shore dive to see Devils Grotto, near Eden Rock. The coral reef here seemed to go forever in either direction, with bright splashes of color all over. I also got the rare chance to see a juvenile loggerhead sea turtle, a species that has been endangered for years. Though I didn’t come at the right time of year, they do have massive schools of silversides at Devils grotto as well, which I hear is pretty amazing.
The other dive I got to do during my time in Grand Cayman was a boat dive off of Spotts Beach. The fish life was flourishing here, and this dive probably had the highest density of fish I’ve seen on any reef. We got to see a few eels, and a group of Tarpon.
I did both of my dives through Don Fosters dive shop, which I happened upon by accident heading to Eden Rock. Both of my dives were absolutely fantastic, and the dive guides were very professional and fun. The weather did mean that dive opportunities were somewhat unpredictable, but they managed to tell me if my dives were cancelled the night before both times. Though they don’t do many east side dives, I would recommend them for any of your west side dives. I tried to do a dive through the famous Sunset House, but my dive was cancelled only thirty minutes before I was supposed to be there, and the employee I was dealing with was not gracious, so I gave up on that venture quickly.
When it comes to renting gear, all dive shops are likely to rent both dive and snorkel gear. Divers supply is the only shop I found that actually sold gear, and they rent out gear as well. This would be a good place to rent snorkel gear for your trip if thats what you need, though it is fairly expensive. I would recommend renting your dive gear through whichever shop you choose to dive through, and only rent it for your dive. That will save you a bit of money in renting.
I hope you all found this information helpful! Until next time, live free my fellow travel bugs!
Thanks for joining me! My name is Patience, and I’m just a college girl who caught the travel bug! Here I will bring you with me on my trips, describing my travels in hopes of giving you the travel bug. Once you catch it, i will provide tips and tricks that I have learned in my travels to help you out as well!
“The world is a book and those who do not travel read only the front page.” ~ St.Agustine